

2025-02-12 18:13:40,某些文章具有时效性,若有错误或已失效,请在下方留言。In final stream in this miniseries about making games with SwiftUI, we’re going to create a mini sudoku game from scratch. It’s pretty packed, but a fantastic starting point for your own projects!
在这个关于使用 SwiftUI 制作游戏的迷你系列的最后一个流中,我们将从头开始创建一个迷你数独游戏。它非常紧凑,但对于您自己的项目来说却是一个绝佳的起点!
Starting on the algorithm 从算法开始
Creating a good sudoku app means being able to create good sudoku boards dynamically. This takes less work than you might expect, partly because we’re going to start out by using a very lazy algorithm (don’t worry, we’ll improve it later!), but partly also because we’re not going to add any validation of our boards – they will be programmed to be corrected, so validation ought not to be needed.
创建一个好的数独应用程序意味着能够动态地创建好的数独板。这需要的工作比你预期的要少,部分原因是我们将从一个非常懒惰的算法开始(别担心,我们稍后会改进它!),但部分也是因为我们不打算添加任何板子的验证——它们将被编程为被纠正,所以应该不需要验证。
To get started, make a new Swift file called Board.swift, then give it this code:
首先,创建一个名为 Board.swift 的新 Swift 文件,然后给它以下代码:
struct Board: Equatable {
    let size = 9
    var fullBoard = [[Int]]()
    var playerBoard = [[Int]]()
}
That creates the three most important values for our sudoku board: how big it is, what all the correct answers are, and what the current answers are. I’ve added the Equatable protocol so SwiftUI is able to watch a board for changes.
这为我们的数独板创建了三个最重要的值:它有多大,所有正确答案是什么,以及当前答案是什么。我添加了 Equatable 协议,以便 SwiftUI 能够监视数独板的更改。
Tip: We’re storing size so it can be used elsewhere, but this project is exclusively designed to generate 9×9 sudoku. If you wanted to extend it to support other sizes that would certainly be fun!
提示: 我们存储了大小,以便可以在其他地方使用,但这个项目是专门为生成 9×9 数独而设计的。如果您想扩展它以支持其他尺寸,那肯定会很有趣!
To make the board creation code easier to follow, we’ll split it into two methods: one to create the full board, then one to remove some numbers so it’s ready for the user to play.
为了使棋盘创建代码更易于理解,我们将它分为两种方法:一种用于创建整个棋盘,另一种用于删除一些数字,以便用户能够玩。
Again, our board creation algorithm is going to be extremely simple at first – just enough that we can see a board is being created, so we’re able to proceed to the SwiftUI part of the project. We’ll return to it later to make it better, so don’t be discouraged when you realize the boards are dull!
同样,我们的数独板创建算法一开始将非常简单——刚好可以看到正在创建的开发板,因此我们能够继续进行项目的 SwiftUI 部分。我们稍后会回来让它变得更好,所以当您意识到数独板很沉闷时,请不要气馁!
Start by adding a stub for a create() method, like this:
首先为 create() 方法添加一个存根,如下所示:
mutating private func create() {
    // more code to come
}
We’re going to fill that method in piece by piece, starting with the easiest part: we know each row, column, and each 3×3 box must have the numbers 1 through 9, so we can start by creating those numbers:
我们将逐个填写该方法,从最简单的部分开始:我们知道每一行、每一列和每个 3×3 框都必须包含数字 1 到 9,因此我们可以从创建这些数字开始:
let numbers = Array(1...size)
Next, we can’t pick numbers from there randomly, because it would lead to some numbers appearing more than once in a given row or column. Instead, we’re going to place the numbers in very precise positions so they are split across the 3×3 boxes – one in the first box, one in the second, one in the third, then another in the first, another in the second, and so on.
接下来,我们不能从那里随机选择数字,因为这会导致某些数字在给定的行或列中出现不止一次。相反,我们将数字放置在非常精确的位置,以便将它们分成 3×3 的方框——一个在第一个方框中,一个在第二个方框中,一个在第三个方框中,然后另一个在第一个方框中,另一个在第二个方框中,依此类推。
Add this line next: 接下来添加此行:
let positions = [0, 3, 6, 1, 4, 7, 2, 5, 8]
Next we need to loop over all the rows and columns we want to place. This is where we’ll take a simple shortcut so you can see how the algorithm works – rather than loop over them semi-randomly, we will instead just loop over the size of our grid, like this:
接下来,我们需要遍历我们想要放置的所有行和列。这就是我们将采用一个简单的快捷方式的地方,以便您可以了解算法的工作原理 – 而不是半随机地循环它们,而是只循环网格的大小,如下所示:
let rows = Array(0..<size)
let columns = Array(0..<size)
The remainder of this method needs to loop over the rows and columns, calculating the correct number for each square. Start with this, to create lots of empty rows and append them our full board, before copying that into the player’s copy of the board:
此方法的其余部分需要遍历行和列,计算每个方块的正确数字。从这个开始,创建大量空行并将它们附加到我们的整个看板中,然后再将其复制到玩家的看板副本中:
for row in rows {
    var newRow = [Int]()

    for column in columns {
        // more code to come
    }

    fullBoard.append(newRow)
}

playerBoard = fullBoard
The real work lies in place of the // more code to come comment, but really our work here is straightforward:
真正的工作在于代替 More Code to come 注释,但实际上我们在这里的工作很简单:
- Our starting position will be whatever is in the
positionsarray at our current row index. So, for row 0 we’ll use position 0, for row 1 we’ll use position 3, for row 2 we’ll use position 6, etc.
我们的起始位置将是positions数组中当前行索引处的任何内容。因此,对于第 0 行,我们将使用位置 0,对于第 1 行,我们将使用位置 3,对于第 2 行,我们将使用位置 6,依此类推。 - We’ll add to that the column number, so the columns flow rightwards from that number. That means column 0 will use the same number we already calculated, but column 1 will be 1 higher, column 2 will be 2 higher, etc.
我们将向该列号添加列号,以便列从该编号向右排列。这意味着第 0 列将使用我们已经计算的相同数字,但第 1 列将高 1 列,第 2 列将高 2 列,依此类推。 - For the very first row that will produce the row
[0, 1, 2, 3, 4, 5, 6, 7, 8]. That matches the indexes in ournumbersarray, but all subsequent rows will go beyond 8 and thus out of the array’s range. So, we need to use modulus to bring the value back down to the correct range.
对于将生成行[0, 1, 2, 3, 4, 5, 6, 7, 8]的第一行。这与numbers数组中的索引匹配,但所有后续行都将超过 8,因此超出数组的范围。因此,我们需要使用 modulus 将值降低到正确的范围。
Replace the // more code to come comment with this:
将 more code to come 注释替换为以下内容:
let position = (positions[row] + column) % size
newRow.append(numbers[position])
And that’s it! That’s our very first pass at a sudoku board algorithm. It’s deliberately simple, and as you’ll see it’s not terribly effective, but it’s enough to get us started.
就是这样!这是我们第一次尝试数独棋盘算法。它故意简单,正如您将看到的,它不是非常有效,但足以让我们开始。
It will take us a little time to get the SwiftUI grid up and running, so in the meantime try adding this directly after the fullBoard.append(newRow) line:
启动并运行 SwiftUI 网格需要一点时间,因此在此期间,请尝试直接在 fullBoard.append(newRow) 行之后添加以下内容:
print(newRow)
That will print the rows out as they are generated. We can see that in action immediately by adding a simple initializer that calls create() straight away:
这将在生成行时打印出来。我们可以通过添加一个简单的初始化器立即看到它的实际效果,该初始化器立即调用 create():
init() {
    create()
}
And now we can create an instance of that as a property in ContentView:
现在,我们可以在 ContentView 中创建一个实例作为属性:
@State private var board = Board()
If you run the app now you should see our very simple sudoku board being printed. I know it’s a terrible board, and it’s always the same too, but that’s okay – it’s enough for now, and we’ll come back to improve it later.
如果您现在运行该应用程序,您应该会看到我们非常简单的数独板正在打印。我知道这是一个糟糕的板子,它也总是一样的,但这没关系——现在已经足够了,我们稍后会回来改进它。
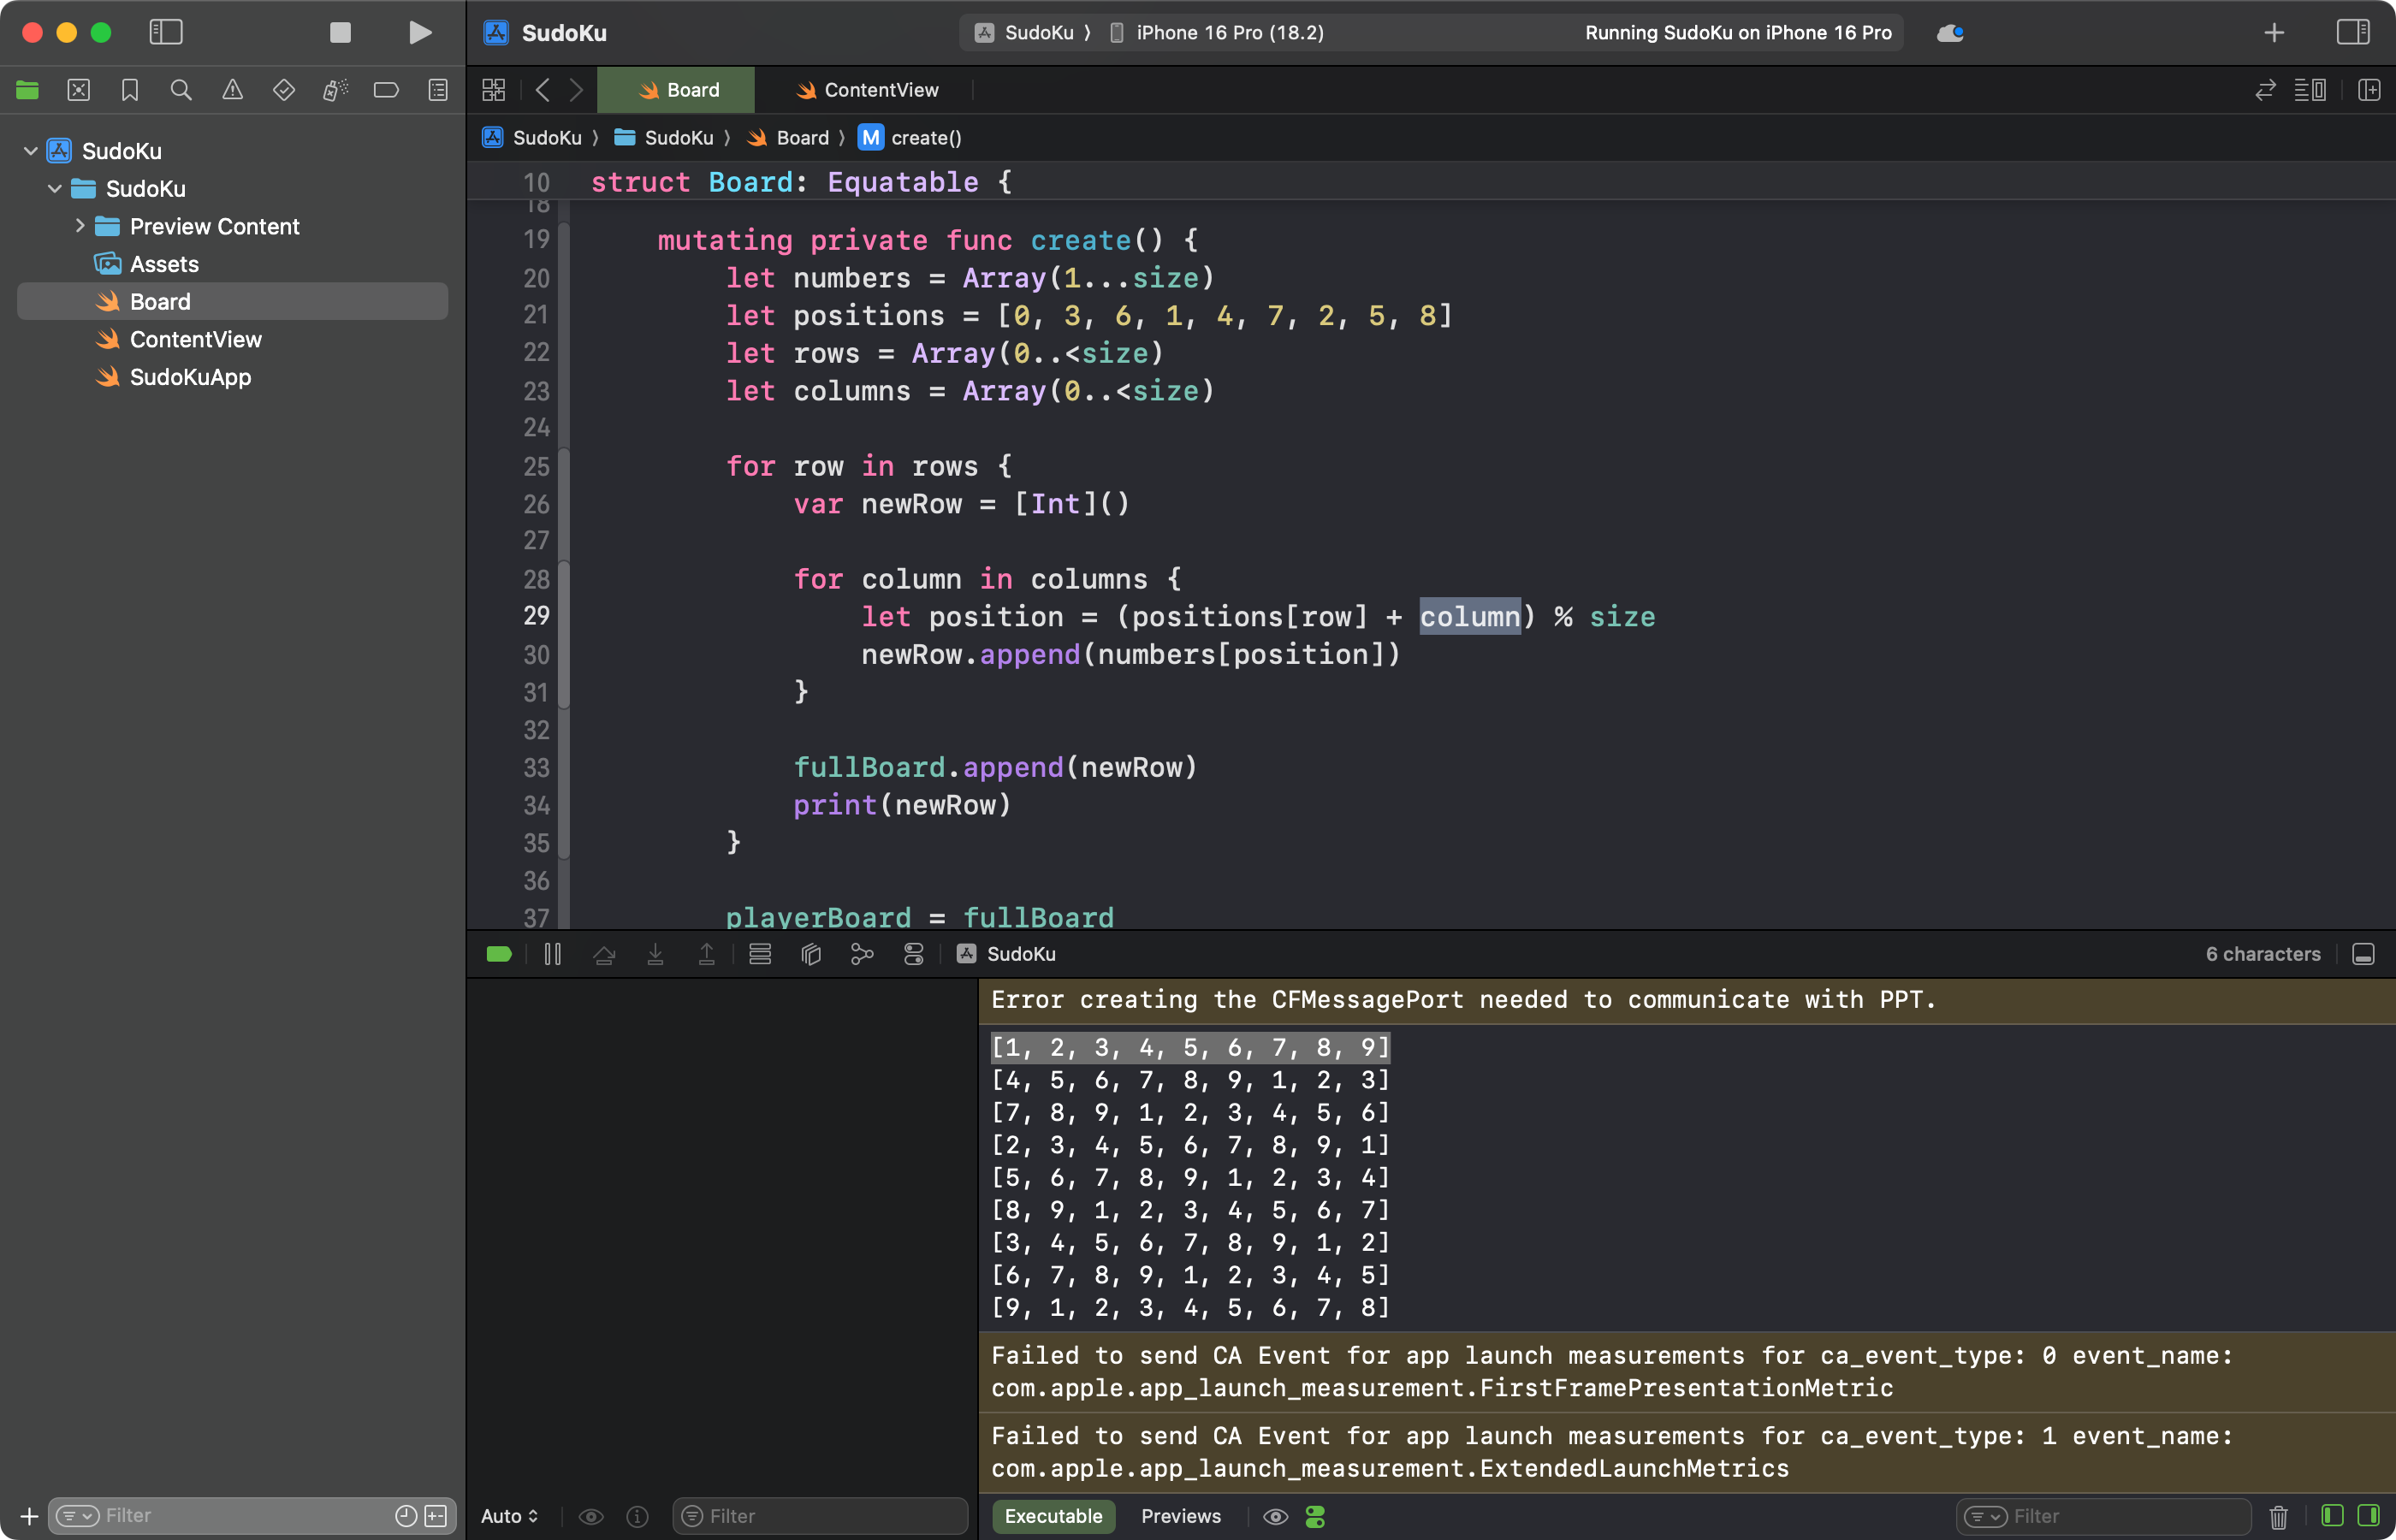
If you look closely at the generated board you should be able to see how our algorithm works. Yes, the board itself is obvious, but look at the shape of the numbers: reading from the top-left 3×3 box downwards we start at 1, then 2, then 3, etc, all the way through to the bottom-right box which starts with 9. This means each number appears uniquely in all nine possible locations.
如果您仔细观察生成的数独板,您应该能够看到我们的算法是如何工作的。是的,棋盘本身是显而易见的,但请看数字的形状:从左上角的 3×3 框向下读取,我们从 1 开始,然后是 2,然后是 3,依此类推,一直到右下角的框,从 9 开始。这意味着每个数字在所有 9 个可能的位置中都是唯一显示的。
Building a grid 构建网格
We’re going to start out with the absolute basics of a grid, then iterate on it a few times until we get something that works well.
我们将从网格的绝对基础开始,然后迭代几次,直到我们得到运行良好的东西。
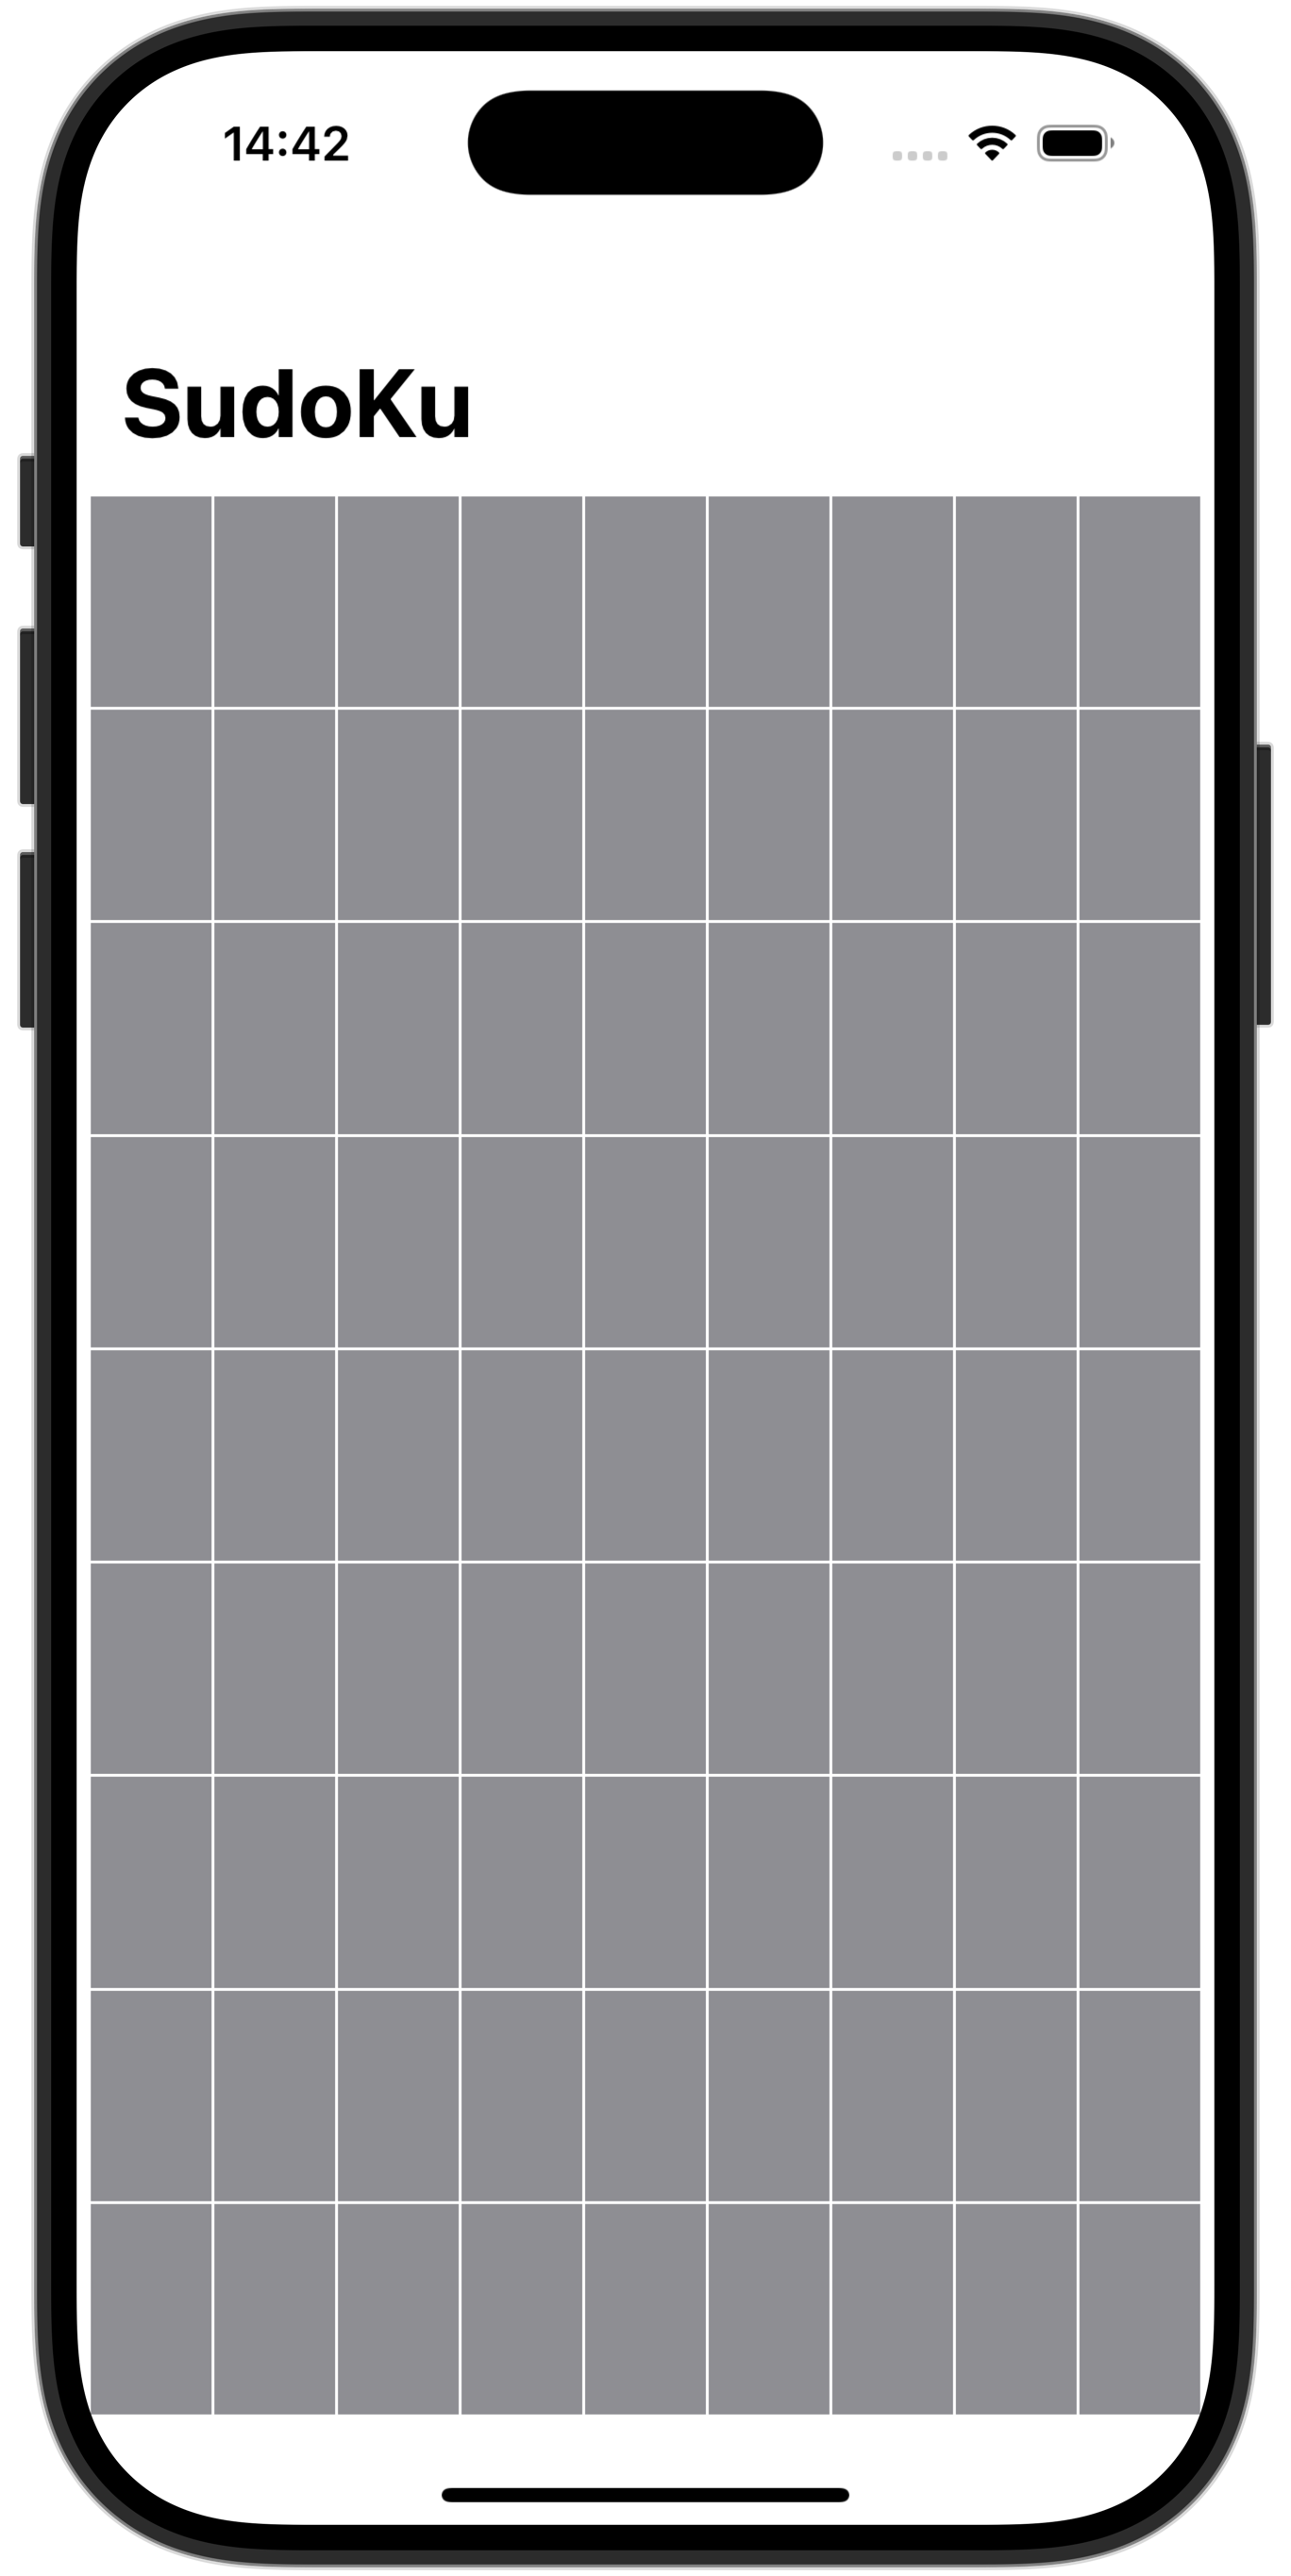
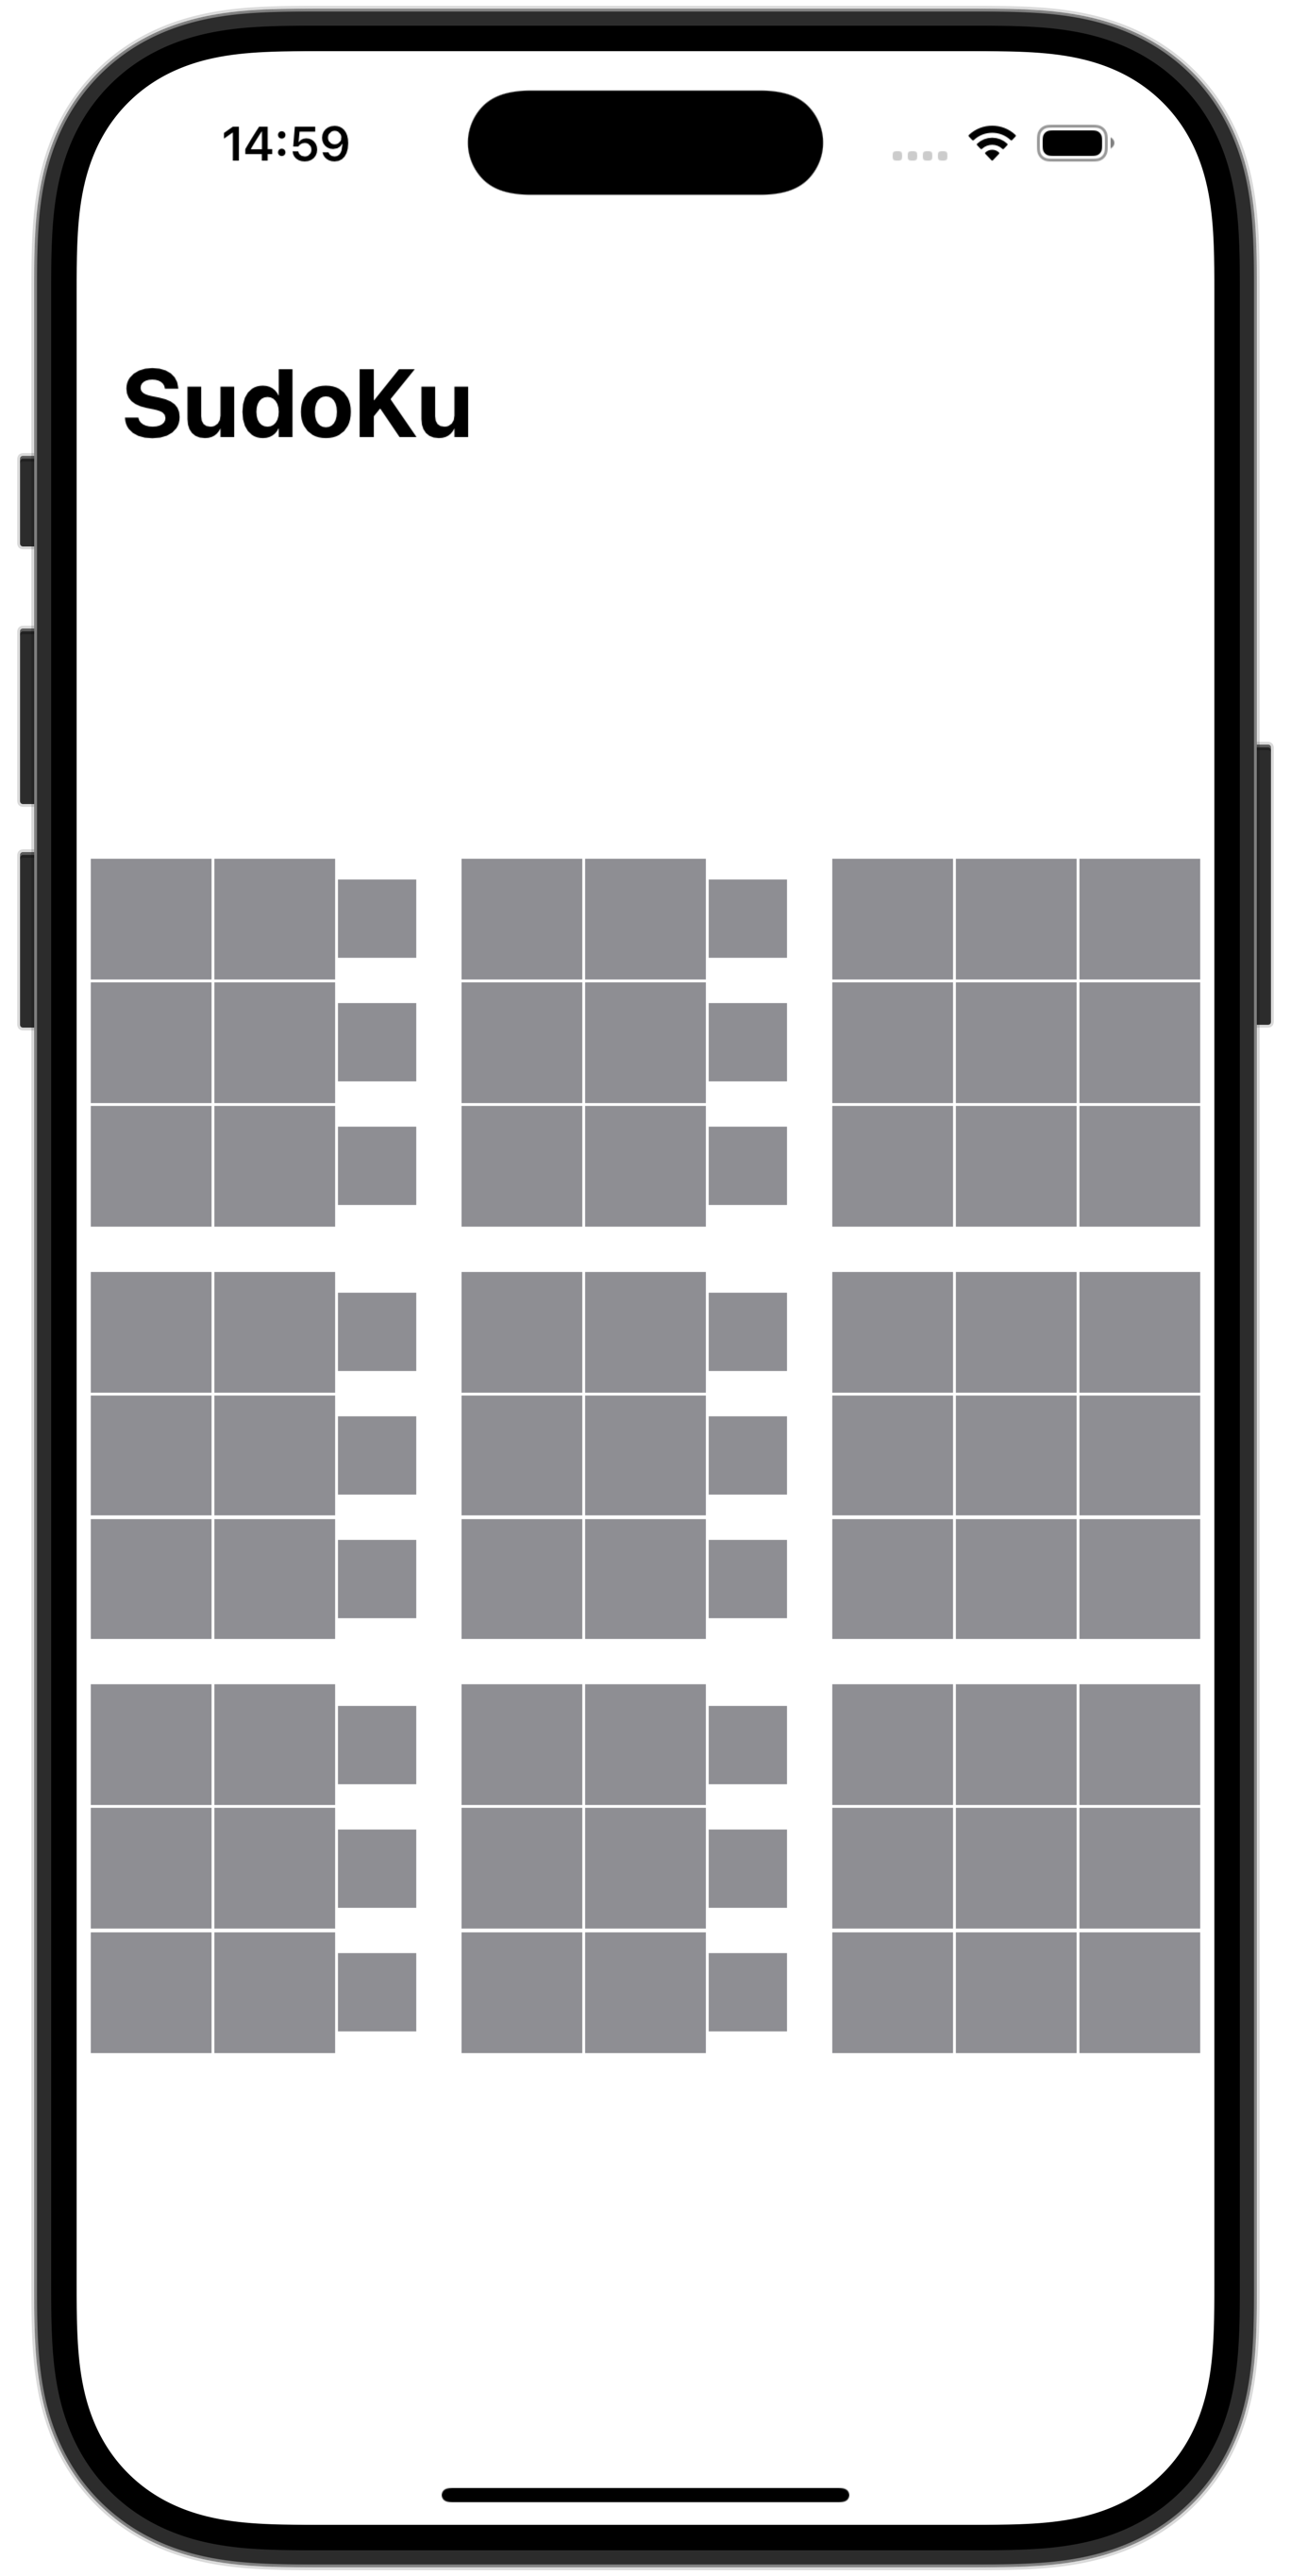
First, the easy part: we’ll draw a grid of rectangles with a small amount of spacing between them, and a navigation title at the top:
首先,简单的部分:我们将绘制一个矩形网格,它们之间有少量的间距,并在顶部有一个导航标题:
NavigationStack {
    VStack {
        Grid(horizontalSpacing: 1, verticalSpacing: 1) {
            ForEach(0..<9) { row in
                GridRow {
                    ForEach(0..<9) { col in
                        Rectangle().fill(.gray)
                    }
                }
            }
        }
        .padding(5)
    }
    .navigationTitle("Tap Sudoku")
}
Yes, that looks nothing like a sudoku board, but again we’re going to iterate until we get something better.
是的,这看起来 一点也 不像数独板,但同样,我们将迭代,直到我们得到更好的东西。
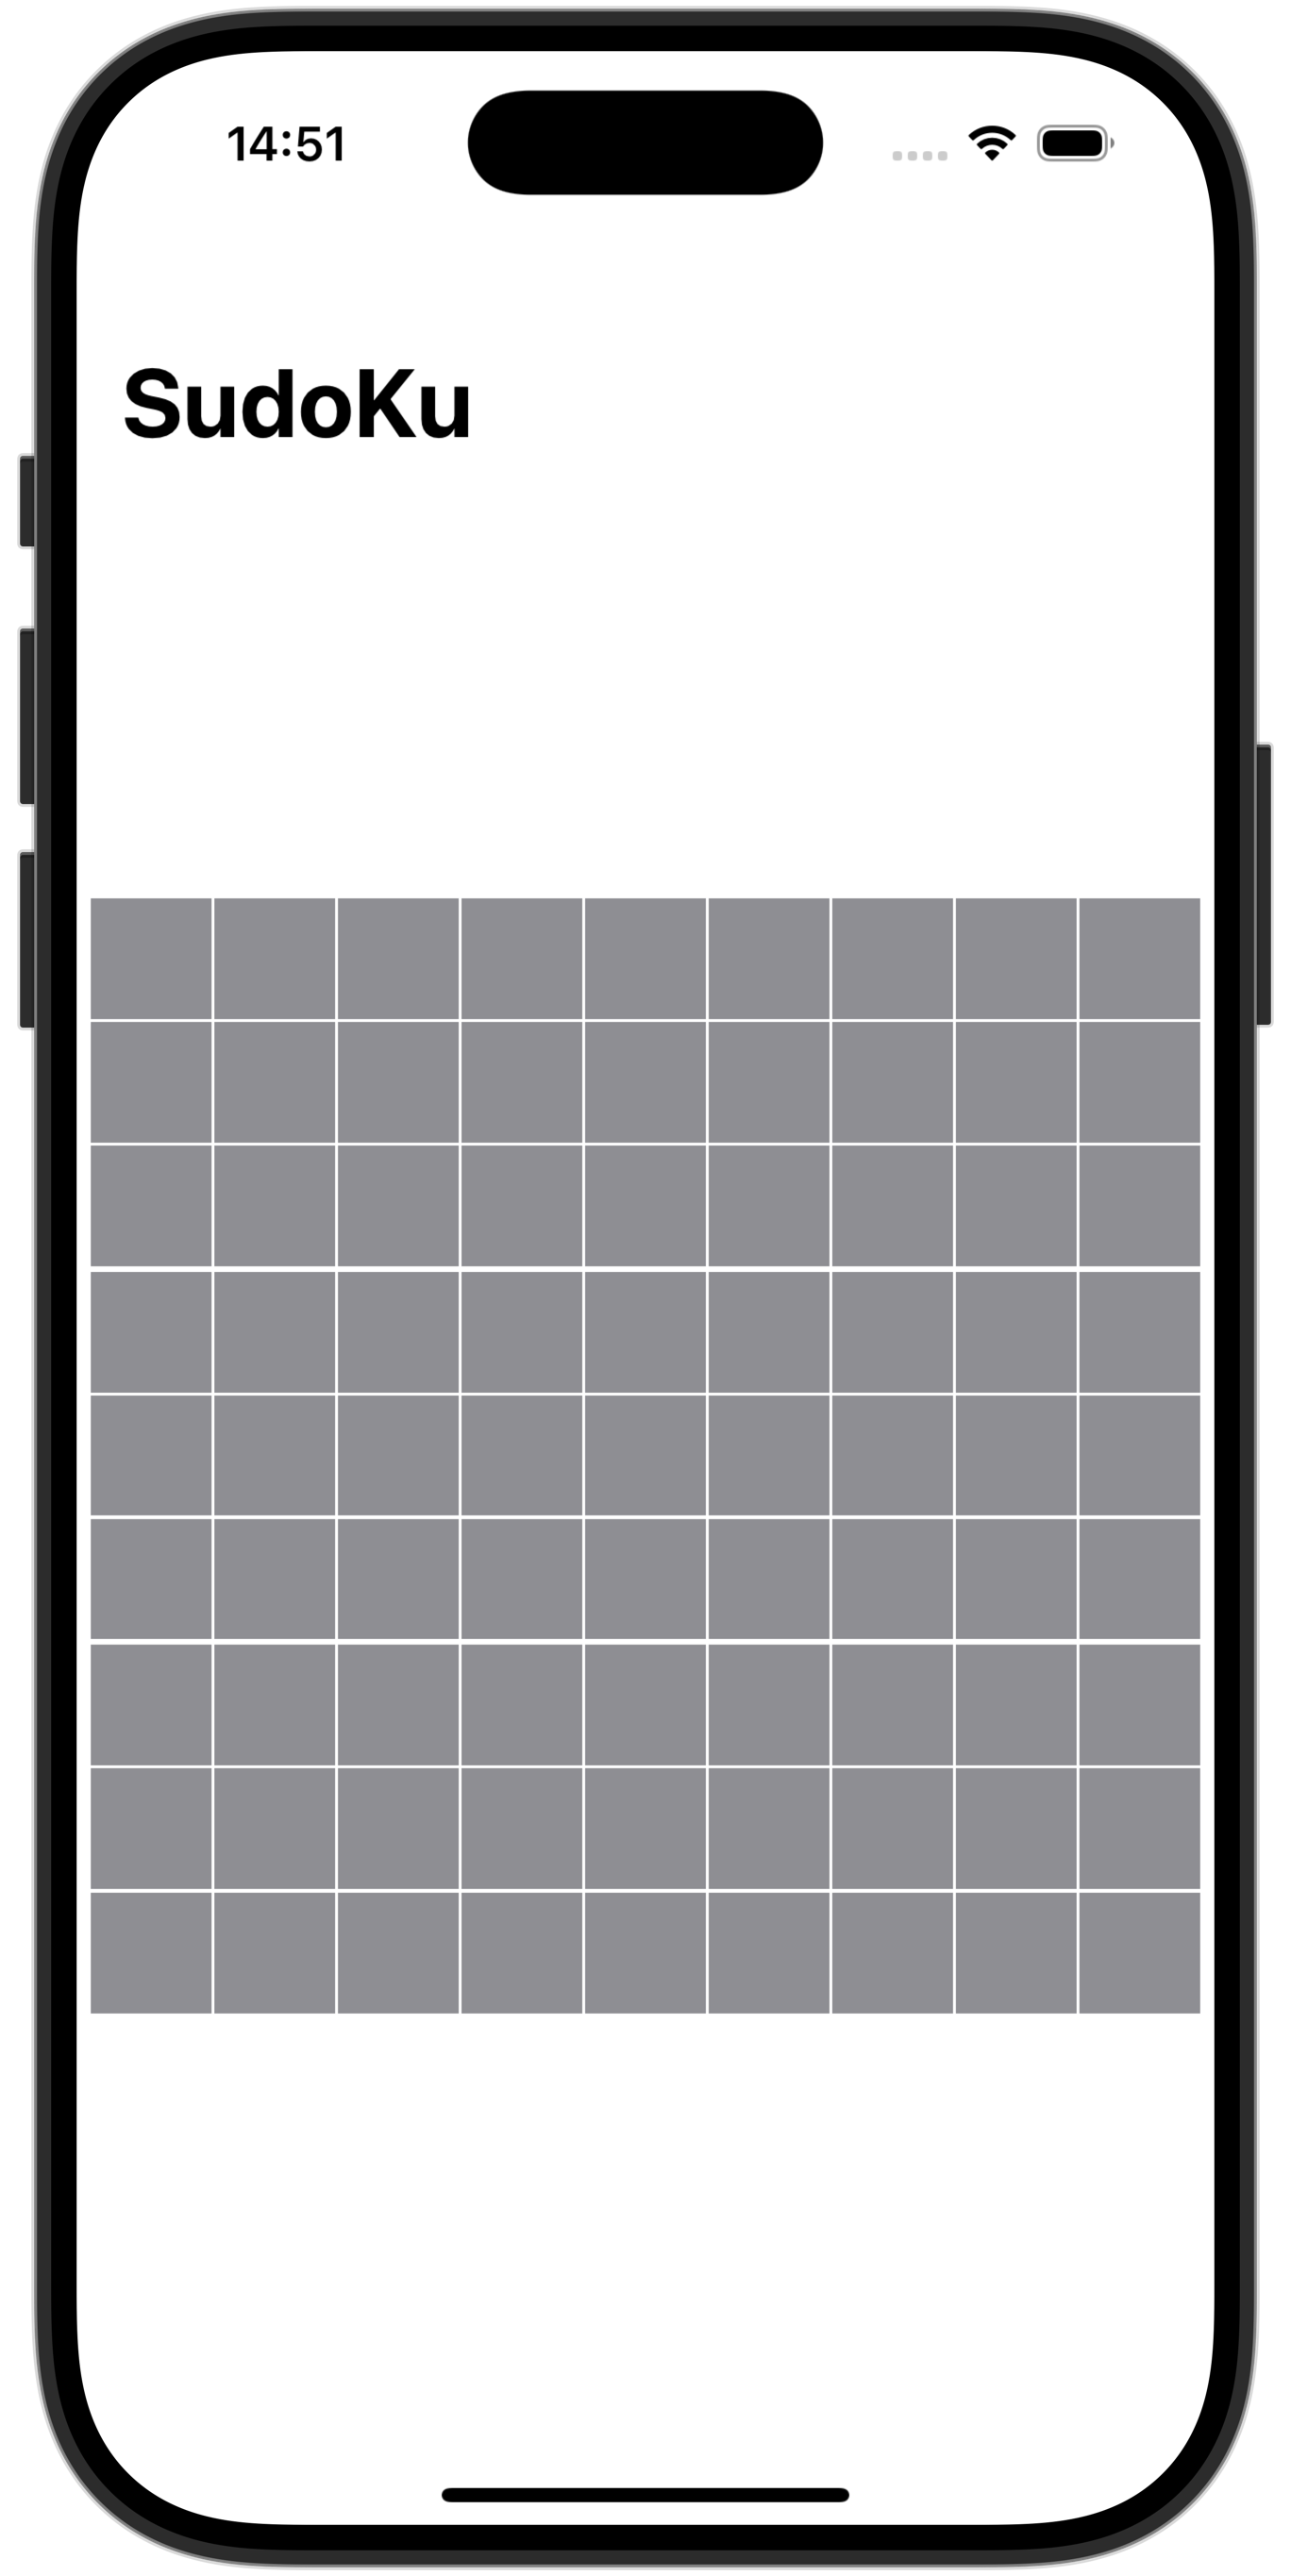
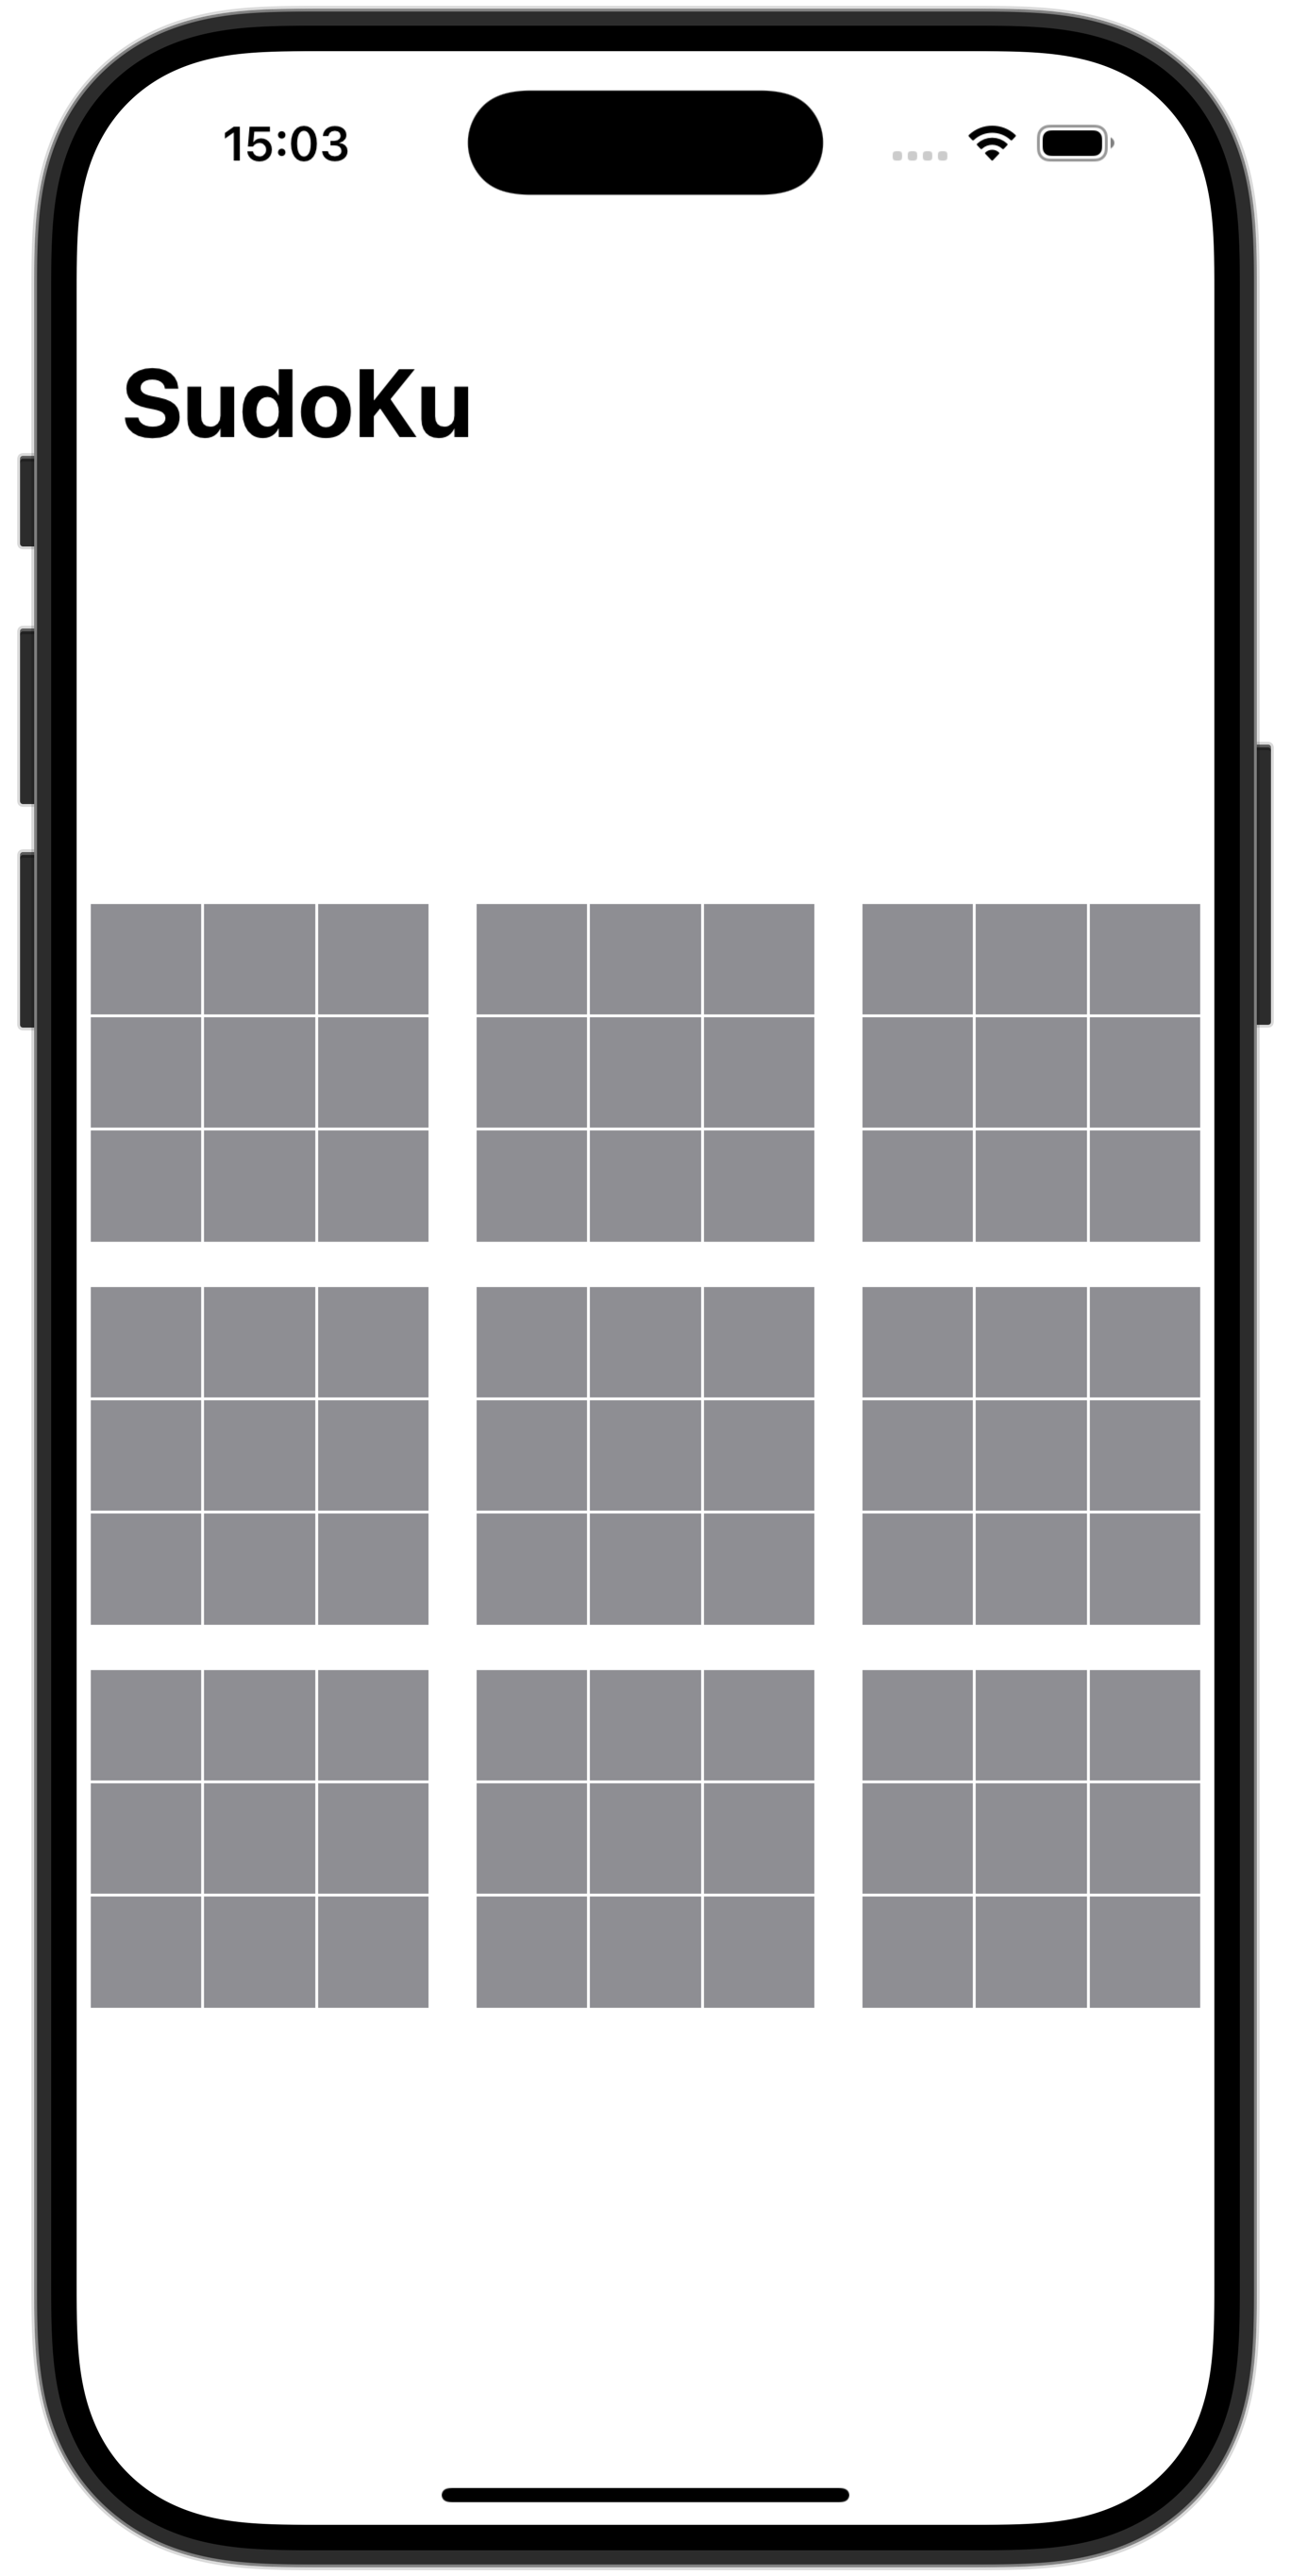
First, each of those grid rectangles needs to be an actual square, so we can add a single modifier to the Rectangle:
首先,每个网格矩形都需要是一个实际的正方形,因此我们可以向 Rectangle 添加单个修饰符:
.aspectRatio(1, contentMode: .fit)

We’ll replace that with something much better shortly, but it’s enough for now.
我们很快就会用更好的东西来替换它,但现在这已经足够了。
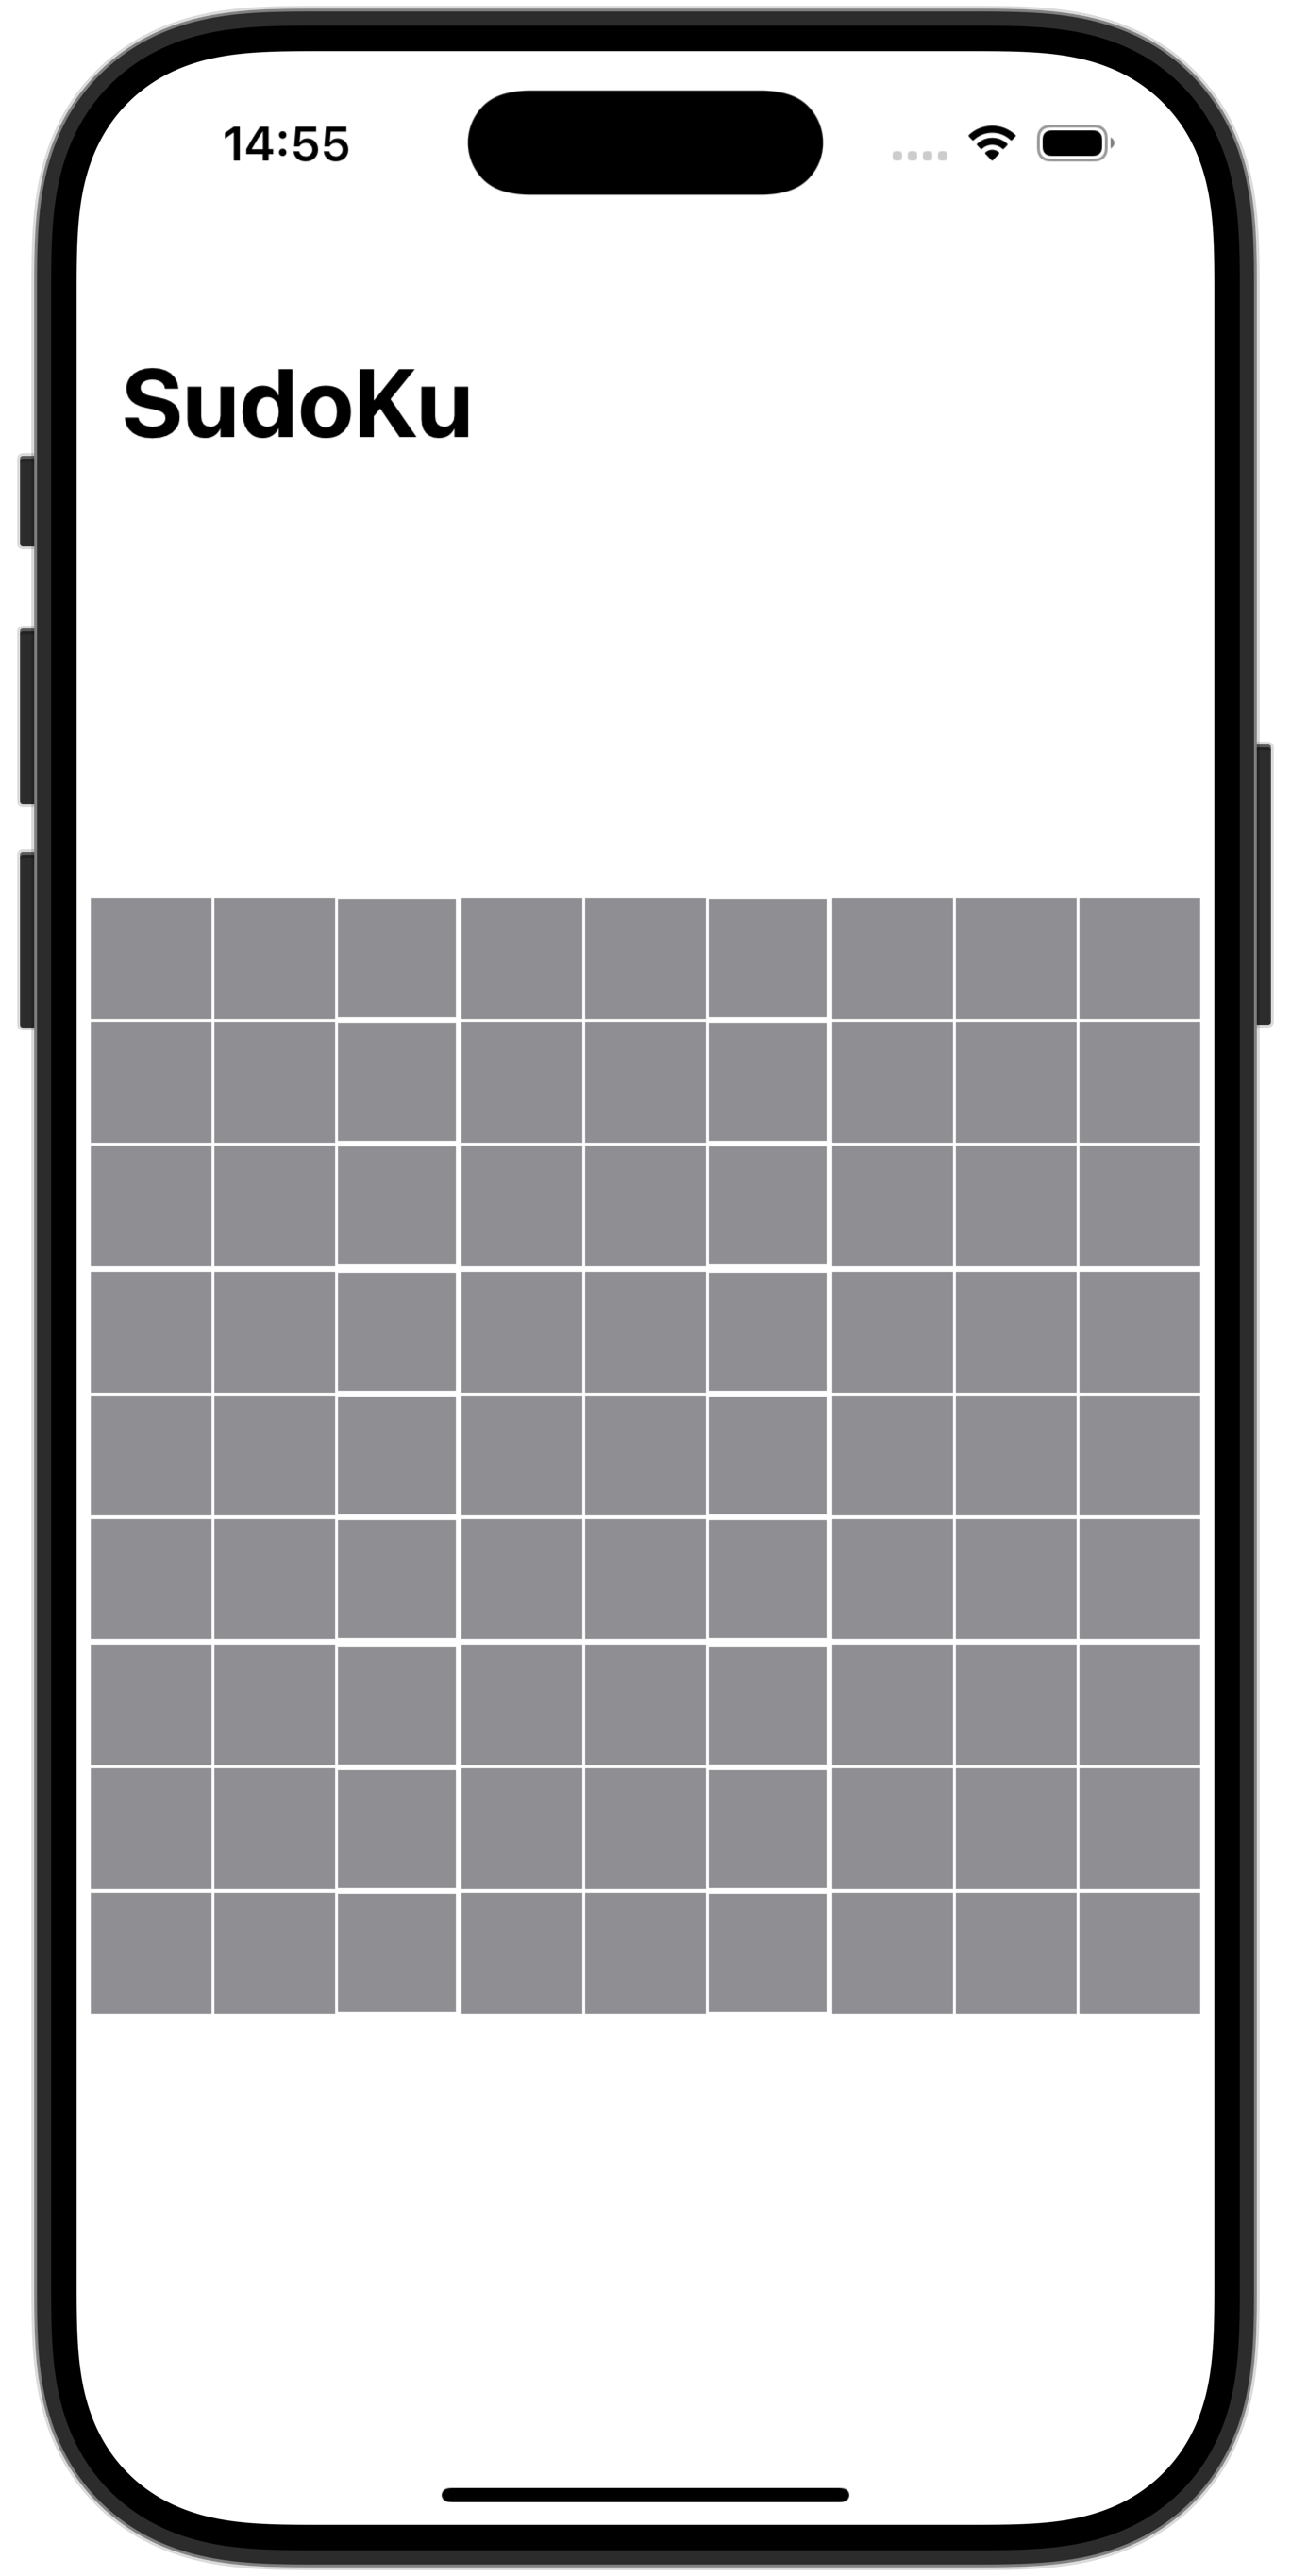
Second, we’re going to add some extra spacing between each of the 3×3 boxes so they are clearer on the screen. We can define the exact amount of extra spacing as a constant property – I think 1.0 looks fine, but you could try 2.0 or even 3.0 depending on what you think looks best.
其次,我们将在每个 3×3 框之间添加一些额外的间距,以便它们在屏幕上更清晰。我们可以将额外间距的确切数量定义为一个常量属性 —— 我认为 1.0 看起来不错,但你可以尝试 2.0 甚至 3.0,这取决于你认为什么看起来最好。
Add this property now: 立即添加此属性:
let spacing = 1.0
We can then use that to create spacing between our rows by adding padding to each GridRow, like this:
然后,我们可以通过向每个 GridRow 添加填充来使用它来在行之间创建间距,如下所示:
.padding(.bottom, row == 2 || row == 5 ? spacing : 0)
To get the same for columns, we need to add this modifier to the Rectangle, before the aspect ratio:
要使列相同,我们需要将此修饰符添加到 Rectangle 中,在纵横比之前:
.padding(.trailing, col == 2 || col == 5 ? spacing : 0)
That works well, but it’s not quite accurate. To see the problem, try increasing the spacing value to something huge, like 15.0. You should see all our rectangles retain their full height, but the widths of the rectangles next to the column breaks are shrunk. This happens because SwiftUI subtracts the padding from the available space for these rectangles, which isn’t ideal.
这很有效,但不是很准确。要查看问题,请尝试将 spacing 值增加到更大的值,例如 15.0。您应该看到所有矩形都保留了其完整高度,但换行符旁边的矩形的宽度缩小了。发生这种情况是因为 SwiftUI 从这些矩形的可用空间中减去了填充,这并不理想。
Now, when spacing is only 1 the difference is very small, but if you ever want a higher value this will cause a problem. A better solution is to add a tiny extra spacer view as the column breaks, which means removing the padding() modifier for the Rectangle and instead adding this after it, still inside the inner ForEach:
现在,当spacing仅为 1 时,差异非常小,但如果您想要更高的值,这将导致问题。更好的解决方案是在列断开时添加一个小的额外分隔视图,这意味着删除 Rectangle 的 padding() 修饰符,而是在它后面添加以下内容,仍然在内部 ForEach 内:
if col == 2 || col == 5 {
    Spacer()
        .frame(width: spacing, height: 1)
}
That will lay out correctly even when using spacing 15. Of course, we don’t actually want spacing of 15, so put it back to 1 or whichever value you think looks good.
即使使用spacing 15,它也会正确布局。当然,我们实际上并不想要 15 的spacing,所以把它放回 1 或任何你认为不错的值。
Before we’re done with this step, I want to add two extra modifiers to the NavigationStack:
在完成此步骤之前,我想向 NavigationStack 添加两个额外的修饰符:
.preferredColorScheme(.dark)
.dynamicTypeSize(...DynamicTypeSize.xxxLarge)
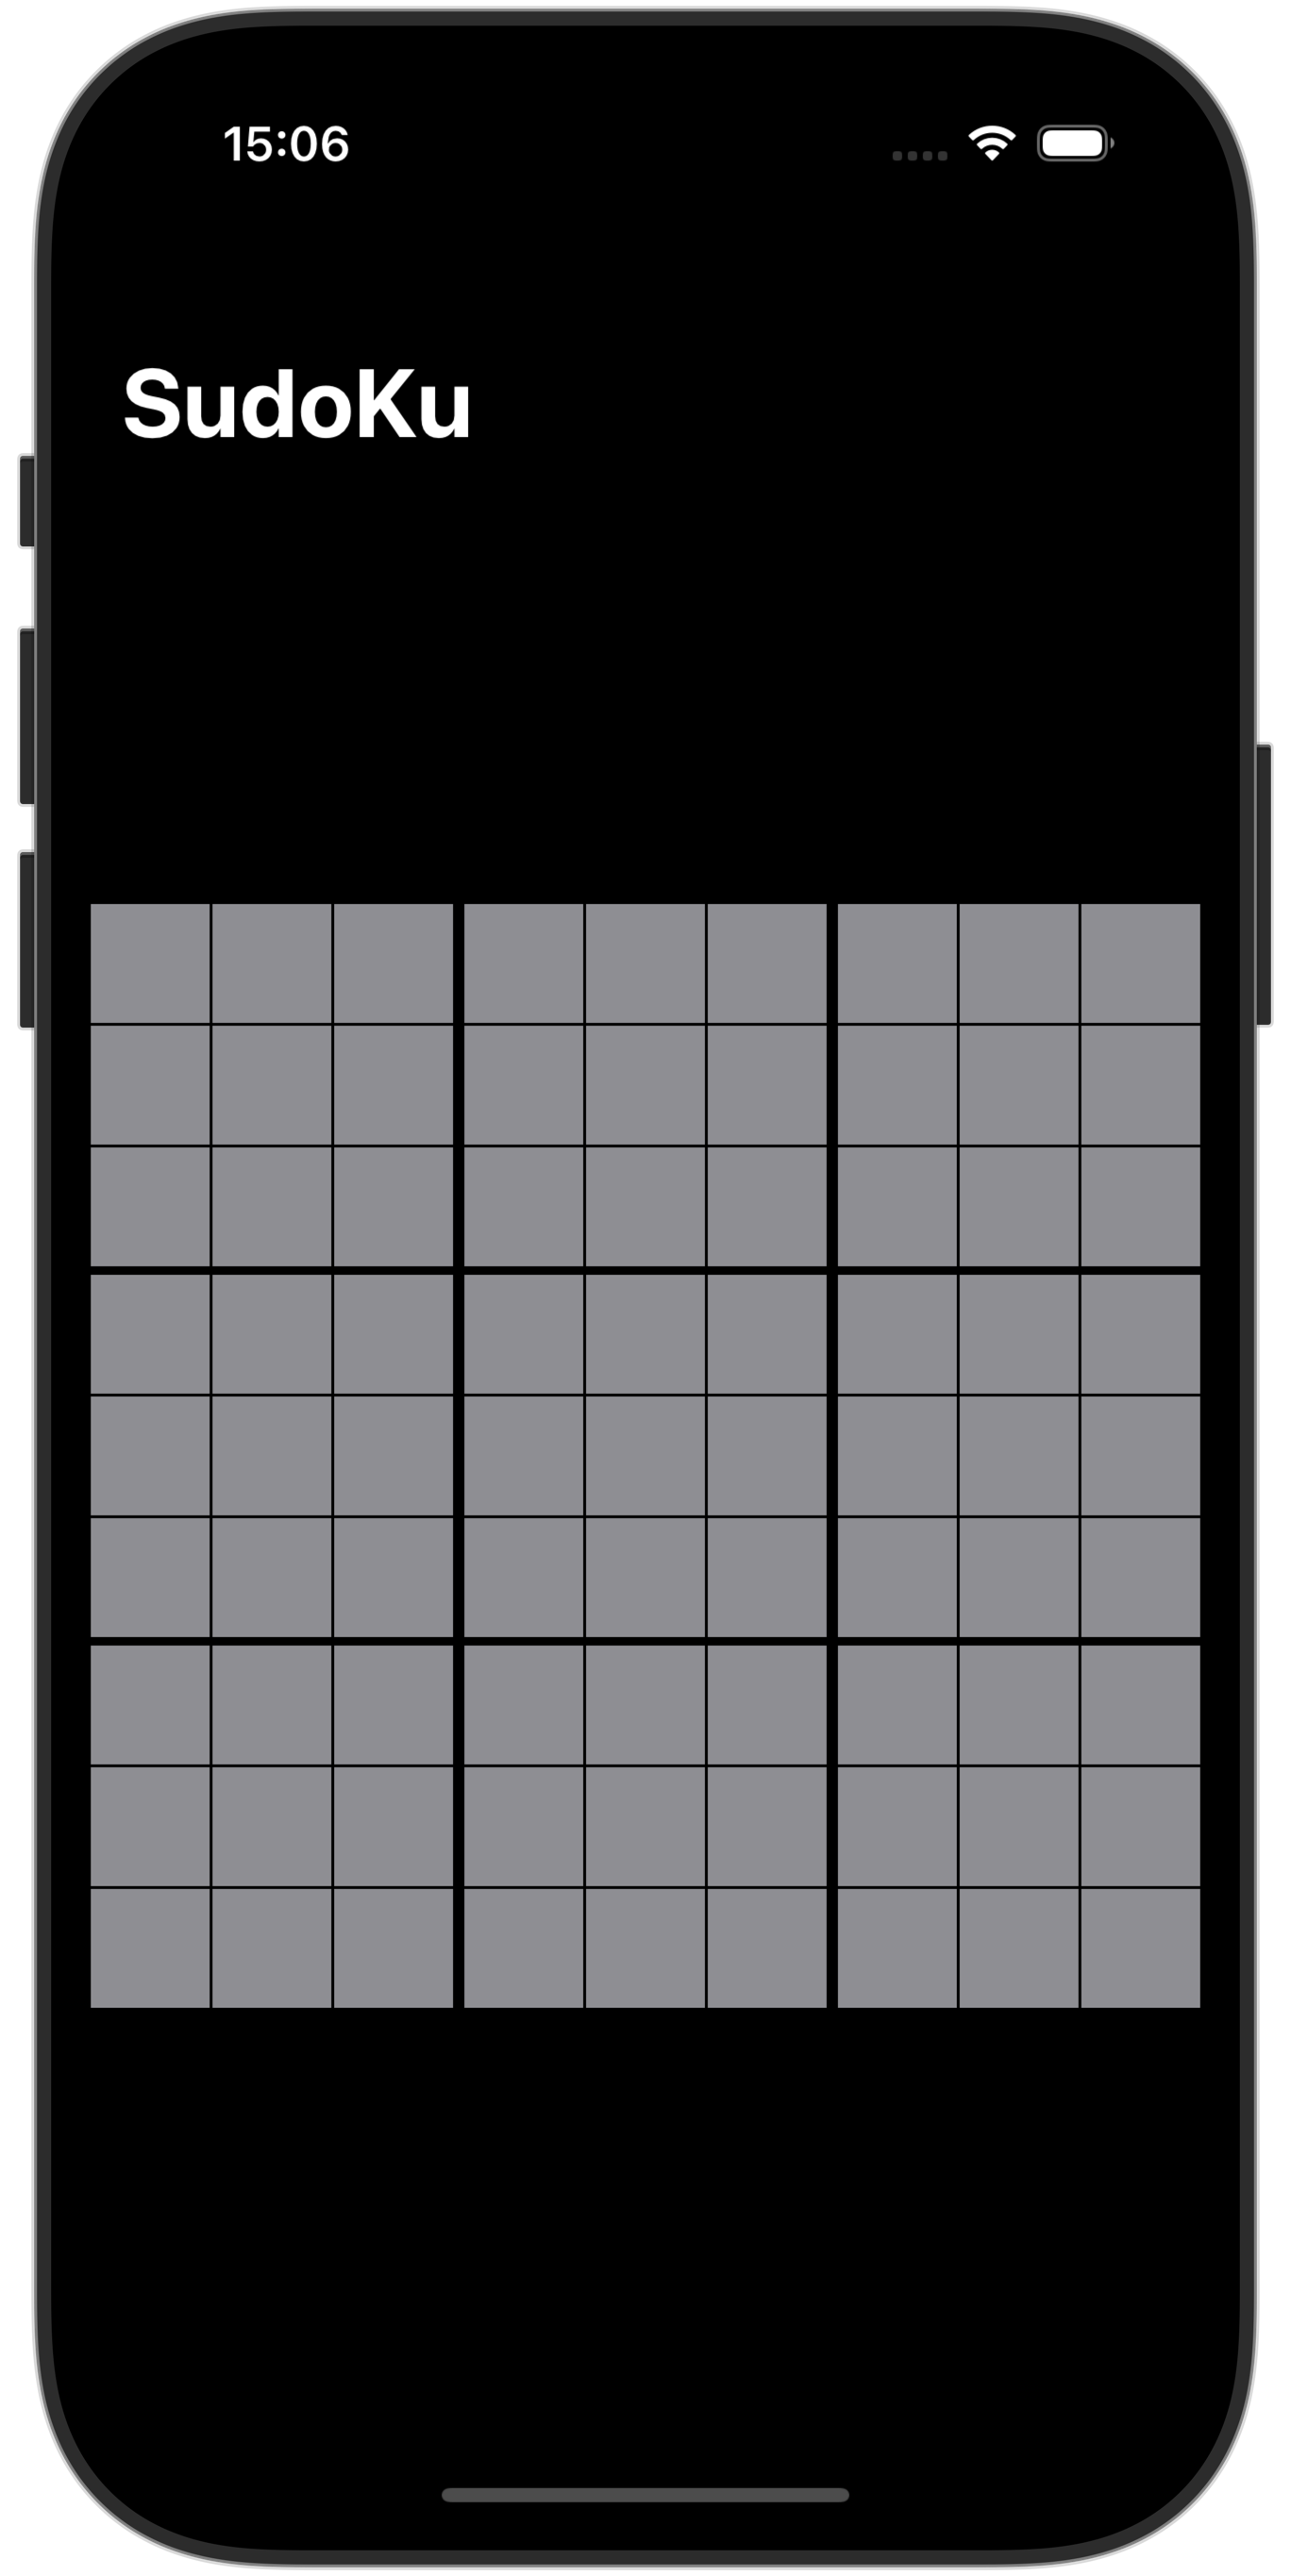
The first one forces us into dark mode, which is much easier on the user’s eyes given how long they’ll be staring at the screen.
第一个强制我们进入暗模式,考虑到用户盯着屏幕看的时间,这对用户的眼睛来说要容易得多。
The second modifier limits the font sizes that will be used, so we support up to and including extra extra extra large text but not any higher. This removes support for all the extra-large accessibility text sizes because they simply won’t fit in the space we have, but before you start worrying that I’m giving up my longstanding commitment to accessibility: relax! We’ll look at making this better later.
第二个修饰符限制将使用的字体大小,因此我们最多支持并包含额外的额外超大文本,但不支持更高的文本。这消除了对所有超大辅助功能文本大小的支持,因为它们根本无法适应我们拥有的空间,但在您开始担心我将放弃我对辅助功能的长期承诺之前:放松!我们稍后会考虑如何改进它。
Selectable grid squares 可选择的网格方块
In last month’s SumThing live stream we made a game where users had to tap squares and enter numbers, with the goal of making all rows and columns add up to a certain number. This time we’re also making a game where users have to tap squares and enter numbers, so some of the logic and layout is very similar.
在上个月的 SumThing 直播中,我们制作了一个游戏,用户必须点击方格并输入数字,目标是使所有行和列的总和达到某个数字。这次我们还制作了一个游戏,用户必须点击方格并输入数字,因此一些逻辑和布局非常相似。
As before, we’re going to create a custom SwiftUI view to represent one square in the grid. This lets us isolate all the functionality and design in one place, rather than cluttering up ContentView with more and more code.
和以前一样,我们将创建一个自定义的 SwiftUI 视图来表示网格中的一个方块。这让我们可以将所有功能和设计隔离在一个地方,而不是用越来越多的代码弄乱 ContentView。
We’re going to start by creating a handful of custom colors that we’ll be using elsewhere in the game. Create a new Swift file called Color-Cells.swift, replace its Foundation import with SwiftUI so we can access the Color struct, then give it this code:
我们将首先创建一些自定义颜色,我们将在游戏的其他地方使用这些颜色。创建一个名为 Color-Cells.swift 的新 Swift 文件,将其 Foundation 导入替换为 SwiftUI,以便我们可以访问 Color 结构,然后为其提供以下代码:
extension Color {
    // an unselected square
    static let squareStandard = Color(red: 0.22, green: 0.25, blue: 0.3)

    // the square that is currently active for input
    static let squareSelected = Color.blue

    // a square in the same row or column as our selected square
    static let squareHighlighted = Color(red: 0.1, green: 0.15, blue: 0.2)

    // text for a square with the correct number
    static let squareTextCorrect = Color.white

    // same, but for the wrong number
    static let squareTextWrong = Color.red

    // text for a square that has the same number as our selected square
    static let squareTextSame = Color.yellow
}
The first three of those are background colors, and the last three are foreground colors. That last color is particularly useful in helping users make sense of the grid – when they select a square with a 9 in, for example, we’ll highlight all other 9s on the grid.
其中前三种是背景色,后三种是前景色。最后一种颜色在帮助用户理解网格方面特别有用——例如,当他们选择带有 9 英寸的正方形时,我们将突出显示网格上的所有其他 9。
Next we can start building out a new view to handle a single cell in the grid. Create a new SwiftUI view called CellView, then give it this code:
接下来,我们可以开始构建一个新视图来处理网格中的单个单元格。创建一个名为 CellView 的新 SwiftUI 视图,然后为其提供以下代码:
struct CellView: View {
    enum HighlightState {
        case standard, highlighted, selected

        var color: Color {
            switch self {
            case .standard:
                return .squareStandard
            case .highlighted:
                return .squareHighlighted
            case .selected:
                return .squareSelected
            }
        }
    }
}
That creates a nested enum to handle the three highlighted states we support, converting each one to a color we defined earlier.
这将创建一个嵌套的枚举来处理我们支持的三种高亮显示的状态,并将每个状态转换为我们之前定义的颜色。
Inside that view we need five properties:
在该视图中,我们需要 5 个 properties:
- The correct number for this cell.
此单元格的正确数字。 - The selected number in the main grid, so we can decide whether to make this number yellow or not.
主网格中选定的数字,因此我们可以决定是否将此数字设为黄色。 - The highlight state for its background color.
其背景色的高亮状态。 - Whether the current value is correct or not.
当前值是否正确。 - What to do when the cell is tapped.
点击单元格时该怎么办。
Add these five now: 现在添加这五个:
let number: Int
let selectedNumber: Int
let highlightState: HighlightState
let isCorrect: Bool
var onSelected: () -> Void
That will immediately break your preview code, so replace it with some simple placeholders like this:
这会立即破坏你的预览代码,所以请用一些简单的占位符替换它,如下所示:
static var previews: some View {
    CellView(number: 1, selectedNumber: 1, highlightState: .standard, isCorrect: true) { }
}
Before we turn to the body of this view, I want to add two extra computed properties to make the code easier. The first is the same thing we had in the SumThing project, which return the number as a string if it’s non-zero, otherwise sends back an empty string:
在我们转向此视图的主体之前,我想添加两个额外的计算属性以简化代码。第一个方法与我们在 SumThing 项目中的相同,如果数字不为零,则以字符串形式返回数字,否则返回空字符串:
var displayNumber: String {
    if number == 0 {
        return ""
    } else {
        return String(number)
    }
}
The second is used to decide which is the correct foreground color to use for the current square. This can be one of three values:
第二个用于确定哪个是当前方块的正确前景色。这可以是以下三个值之一:
- If the square in the number matches the number in the user’s selected square, we’ll send back
.squareTextSame. This means when they select a number, all other squares containing that number will light up.
如果数字中的方格与用户所选方格中的数字匹配,我们将发回.squareTextSame。这意味着当他们选择一个数字时,包含该数字的所有其他方格都会亮起。 - If it’s a different number, but it’s still the correct number, we’ll send back
.squareTextCorrect.
如果它是不同的数字,但它仍然是正确的数字,我们将发回.squareTextCorrect。 - Otherwise we’ll send back
.squareTextWrong.
否则,我们将发回.squareTextWrong。
Add this last property to CellView now:
现在将最后一个属性添加到 CellView 中:
var foregroundColor: Color {
    if isCorrect {
        if number == selectedNumber {
            return .squareTextSame
        } else {
            return .squareTextCorrect
        }
    } else {
        return .squareTextWrong
    }
}
Now at last we can write the body for this view. This is again very similar to the code we wrote for the SumThing project: a button that triggers the onSelected closure when tapped, some flexibility in its width so it can adapt to various screen sizes, a square aspect ratio, plus the correct colors for this square:
现在我们终于可以编写此视图的主体了。这又与我们为 SumThing 项目编写的代码非常相似:一个在点击时触发 onSelected 闭包的按钮,其宽度具有一定的灵活性,因此它可以适应各种屏幕尺寸,正方形纵横比,以及该正方形的正确颜色:
Button(action: onSelected) {
    Text(displayNumber)
        .font(.title)
        .foregroundColor(foregroundColor)
        .frame(maxWidth: 100, maxHeight: 100)
        .aspectRatio(1, contentMode: .fit)
        .background(highlightState.color)
}
.buttonStyle(.plain)
Putting that to use in ContentView takes some thinking, because it relies on other program state: is the square currently selected, or is it in the same row or column as the selected square? Is its number the same as the one the user has currently selected?
在 ContentView 中使用它需要一些思考,因为它依赖于其他程序状态:方块当前是被选中的,还是与被选中的方块位于同一行或同一列中?其编号是否与用户当前选择的编号相同?
We can track all this with new properties in ContentView, to track the selected row, selected column, and selected number:
我们可以使用 ContentView 中的新属性来跟踪所有这些,以跟踪所选行、所选列和所选数字:
@State private var selectedRow = -1
@State private var selectedCol = -1
@State private var selectedNum = 0
Now we can calculate the correct highlight state for a given row and column with a dedicated method, to keep this logic out of the view body:
现在,我们可以使用专用方法计算给定行和列的正确高亮状态,以将此逻辑排除在视图主体之外:
func highlightState(for row: Int, col: Int) -> CellView.HighlightState {
    if row == selectedRow {
        if col == selectedCol {
            return .selected
        } else {
            return .highlighted
        }
    } else if col == selectedCol {
        return .highlighted
    } else {
        return .standard
    }
}
And now we have all the information we need to replace the old Rectangle placeholder with a CellView. Replace that code, including its aspectRatio() modifier, with this:
现在我们有了用 CellView 替换旧的 Rectangle 占位符所需的所有信息。将该代码(包括其 aspectRatio() 修饰符)替换为以下内容:
CellView(number: board.playerBoard[row][col], selectedNumber: selectedNum, highlightState: highlightState(for: row, col: col), isCorrect: board.playerBoard[row][col] == board.fullBoard[row][col]) {
    selectedRow = row
    selectedCol = col
    selectedNum = board.playerBoard[row][col]
}

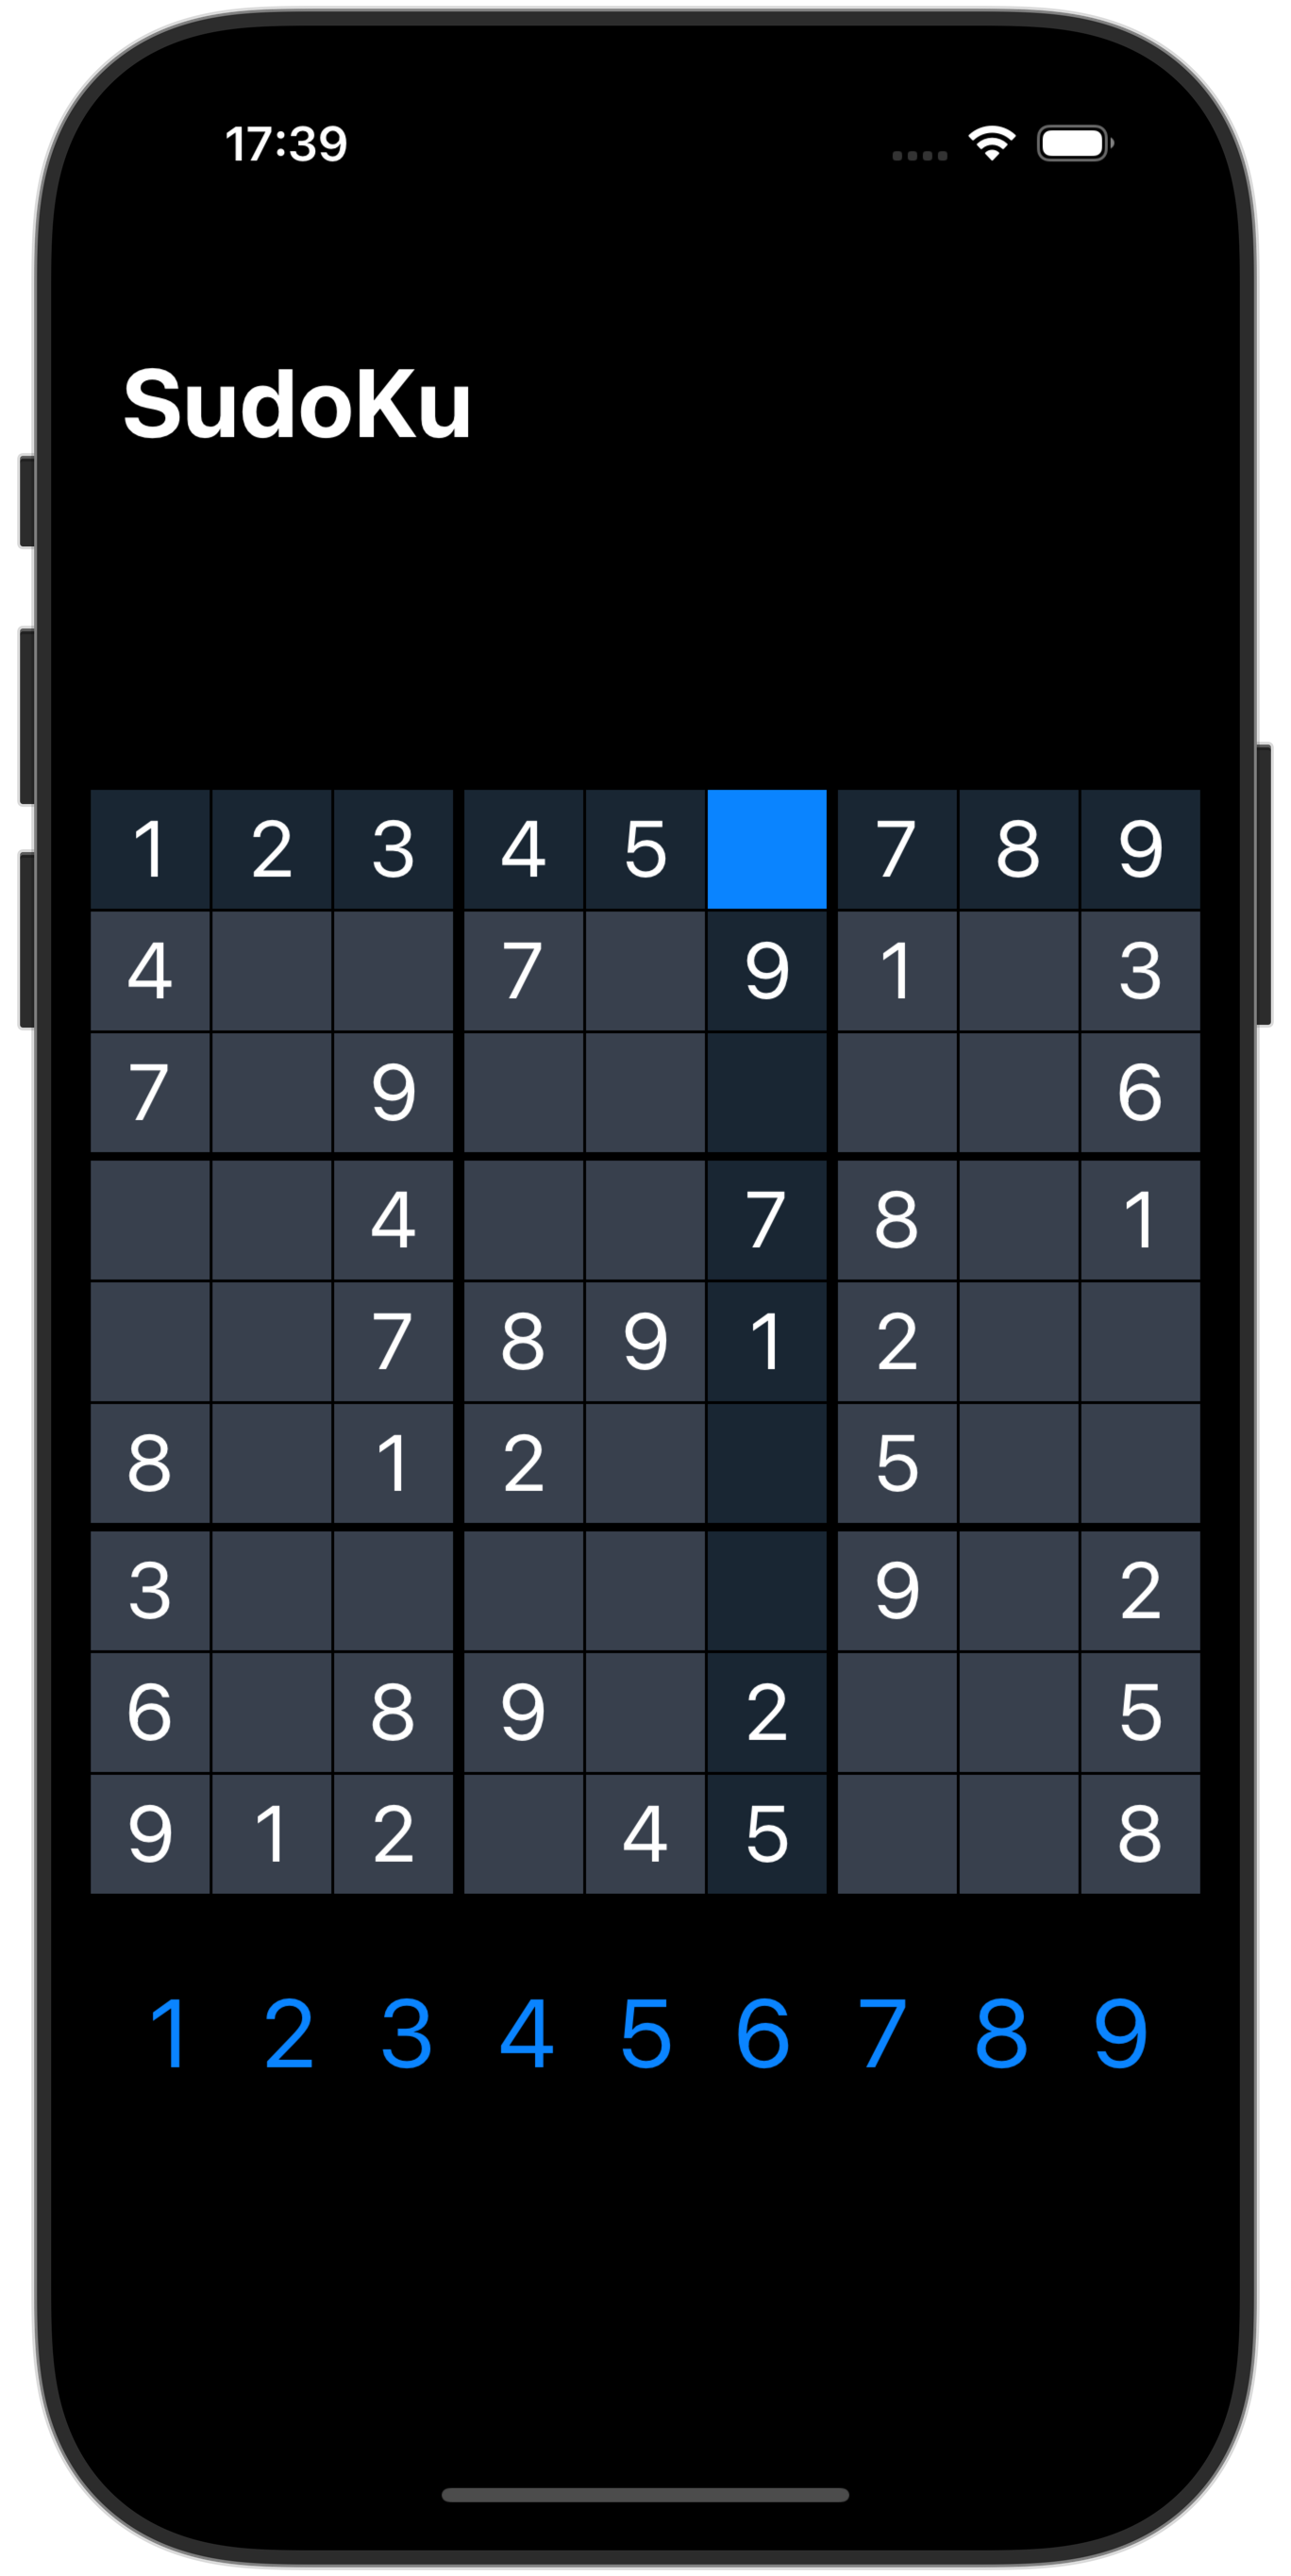
And now things should look a lot better – a full grid of numbers will be visible, and as you click around the various rows and columns should light up appropriately. Progress!
现在事情看起来应该好多了 – 一个完整的数字网格将可见,并且当您单击各个行和列时,它们应该会适当地亮起。进展!
Making it a game 使其成为游戏
We’ve generated a sudoku board and displayed it in a SwiftUI Grid, but to make this an actual game we need to remove a whole bunch of those numbers and let users enter them in.
我们已经生成了一个数独板并将其显示在 SwiftUI 网格中,但要使其成为实际游戏,我们需要删除一大堆数字并让用户输入它们。
How many to remove? Well, that should depend on the difficulty setting the user has chosen, so we can start by creating a new enum inside the Board struct to represent the various difficulty levels. I’m going to add two extra things here: raw values matching how many squares to remove for each difficulty, and also a CaseIterable conformance so we can loop over them all.
要删除多少个?嗯,这应该取决于用户选择的难度设置,因此我们可以先在 Board 结构体中创建一个新的枚举来表示各种难度级别。我将在此处添加两个额外的内容:原始值与每个难度要删除的方块数量匹配,以及 CaseIterable 一致性,以便我们可以循环遍历它们。
Add this inside Board:
在 Board 中添加以下内容:
enum Difficulty: Int, CaseIterable {
    #if DEBUG
    case testing = 2
    #endif
    case trivial = 10
    case easy = 20
    case medium = 24
    case hard = 27
    case extreme = 29
}
Tip: These difficulties are estimates by me; you’re welcome to experiment.
提示: 这些困难是我估计的;欢迎您尝试。
A standard 9×9 sudoku grid has 81 squares, so you might think even the extreme difficulty sounds easy – removing 29 squares still leaves 52 remaining. Well, that’s not quite accurate because of the way sudoku boards are laid out: they have rotational symmetry, which means when we remove one number we also remove the number 180 degrees opposite it. So, for the extreme difficulty we are in fact removing 29 squares twice, making 58 in total.
一个标准的 9×9 数独网格有 81 个方格,所以你可能会认为即使是极端困难听起来也很容易——移除 29 个方格仍然剩下 52 个。嗯,由于数独板的布局方式,这并不完全准确:它们具有旋转对称性,这意味着当我们删除一个数字时,也会删除与它相对 180 度的数字。因此,对于极端难度,我们实际上将 29 个方格删除了两次,总共 58 个。
Now that we have some approximate difficulties defined, we can store one for our board by adding a new property:
现在我们已经定义了一些近似的困难,我们可以通过添加新属性来为我们的板存储一个困难:
let difficulty: Difficulty
We can also use that in a new prepareForPlay() method, which will remove all the squares required for our current difficulty.
我们也可以在新的 prepareForPlay() 方法中使用它,它将删除我们当前难度所需的所有方格。
Start with this: 从这个开始:
private mutating func prepareForPlay() {
    let empties = difficulty.rawValue
    let allCells = 0..<size * size / 2

    // more code to come
}
As you can see, that pulls out the correct number of empty squares we want to produce, and also halves the total number of squares – remember, we’re removing two squares with each pass.
正如你所看到的,这拉出了我们想要生成的正确数量的空方格,并将方格总数减半——请记住,我们每次通过都会删除两个方格。
Now we need to shuffle up all the cell numbers, convert it to a row and column, then set that square to be 0. Again, we need to set its opposite to 0 too, so we get rotation symmetry in our board.
现在我们需要洗牌所有单元格编号,将其转换为行和列,然后将该方块设置为 0。同样,我们也需要将其设置为与 0 相反,这样我们在棋盘中获得了旋转对称性。
Replace the // more code to come comment with this:
将 more code to come 注释替换为以下内容:
for cell in allCells.shuffled().prefix(upTo: empties) {
    let row = cell / size
    let column = cell % size
    playerBoard[row][column] = 0
    playerBoard[8 - row][8 - column] = 0
}
You can’t see that working just yet because we have a compiler error that came as a result of these changes: we need to update the Board initializer so it accepts a difficulty, and also so that it calls prepareForPlay(). Change its code to this:
你还看不到它起作用,因为这些更改导致了编译器错误:我们需要更新 Board 初始化器,以便它接受困难,并使其调用 prepareForPlay()。将其代码更改为:
init(difficulty: Difficulty = .easy) {
    self.difficulty = difficulty

    create()
    prepareForPlay()
}
For testing purposes, I recommend you change the board property in ContentView so it uses the .testing difficulty – it makes it much easier to experiment!
出于测试目的,我建议您更改 ContentView 中的 board 属性,使其使用 .testing 难度 – 这样可以更轻松地进行实验!
Now that our grid has some actual holes, we need a way to let users enter numbers. This will be the same approach we took in the SumThing project: a row of numbered buttons at the bottom, with each one setting or clearer whatever is the selected cell.
现在我们的网格有一些实际的漏洞,我们需要一种方法来让用户输入数字。这与我们在 SumThing 项目中采用的方法相同:底部有一行编号的按钮,每个按钮都有设置或更清晰的所选单元格。
First, add this method to ContentView, so that we can set or clear the value, and also update selectedNum at the same time:
首先,将这个方法添加到 ContentView 中,这样我们就可以设置或者清除值,同时也可以更新 selectedNum:
func enter(_ number: Int) {
    if board.playerBoard[selectedRow][selectedCol] == number {
        board.playerBoard[selectedRow][selectedCol] = 0
        selectedNum = 0
    } else {
        board.playerBoard[selectedRow][selectedCol] = number
        selectedNum = number
    }
}
And now add this below the Grid, so we have a row of tappable numbers:
现在在 Grid 下面添加它,这样我们就有一行可点击的数字:
HStack {
    ForEach(1..<10) { i in
        Button(String(i)) {
            enter(i)
        }
        .frame(maxWidth: .infinity)
        .font(.largeTitle)
    }
}
.padding()
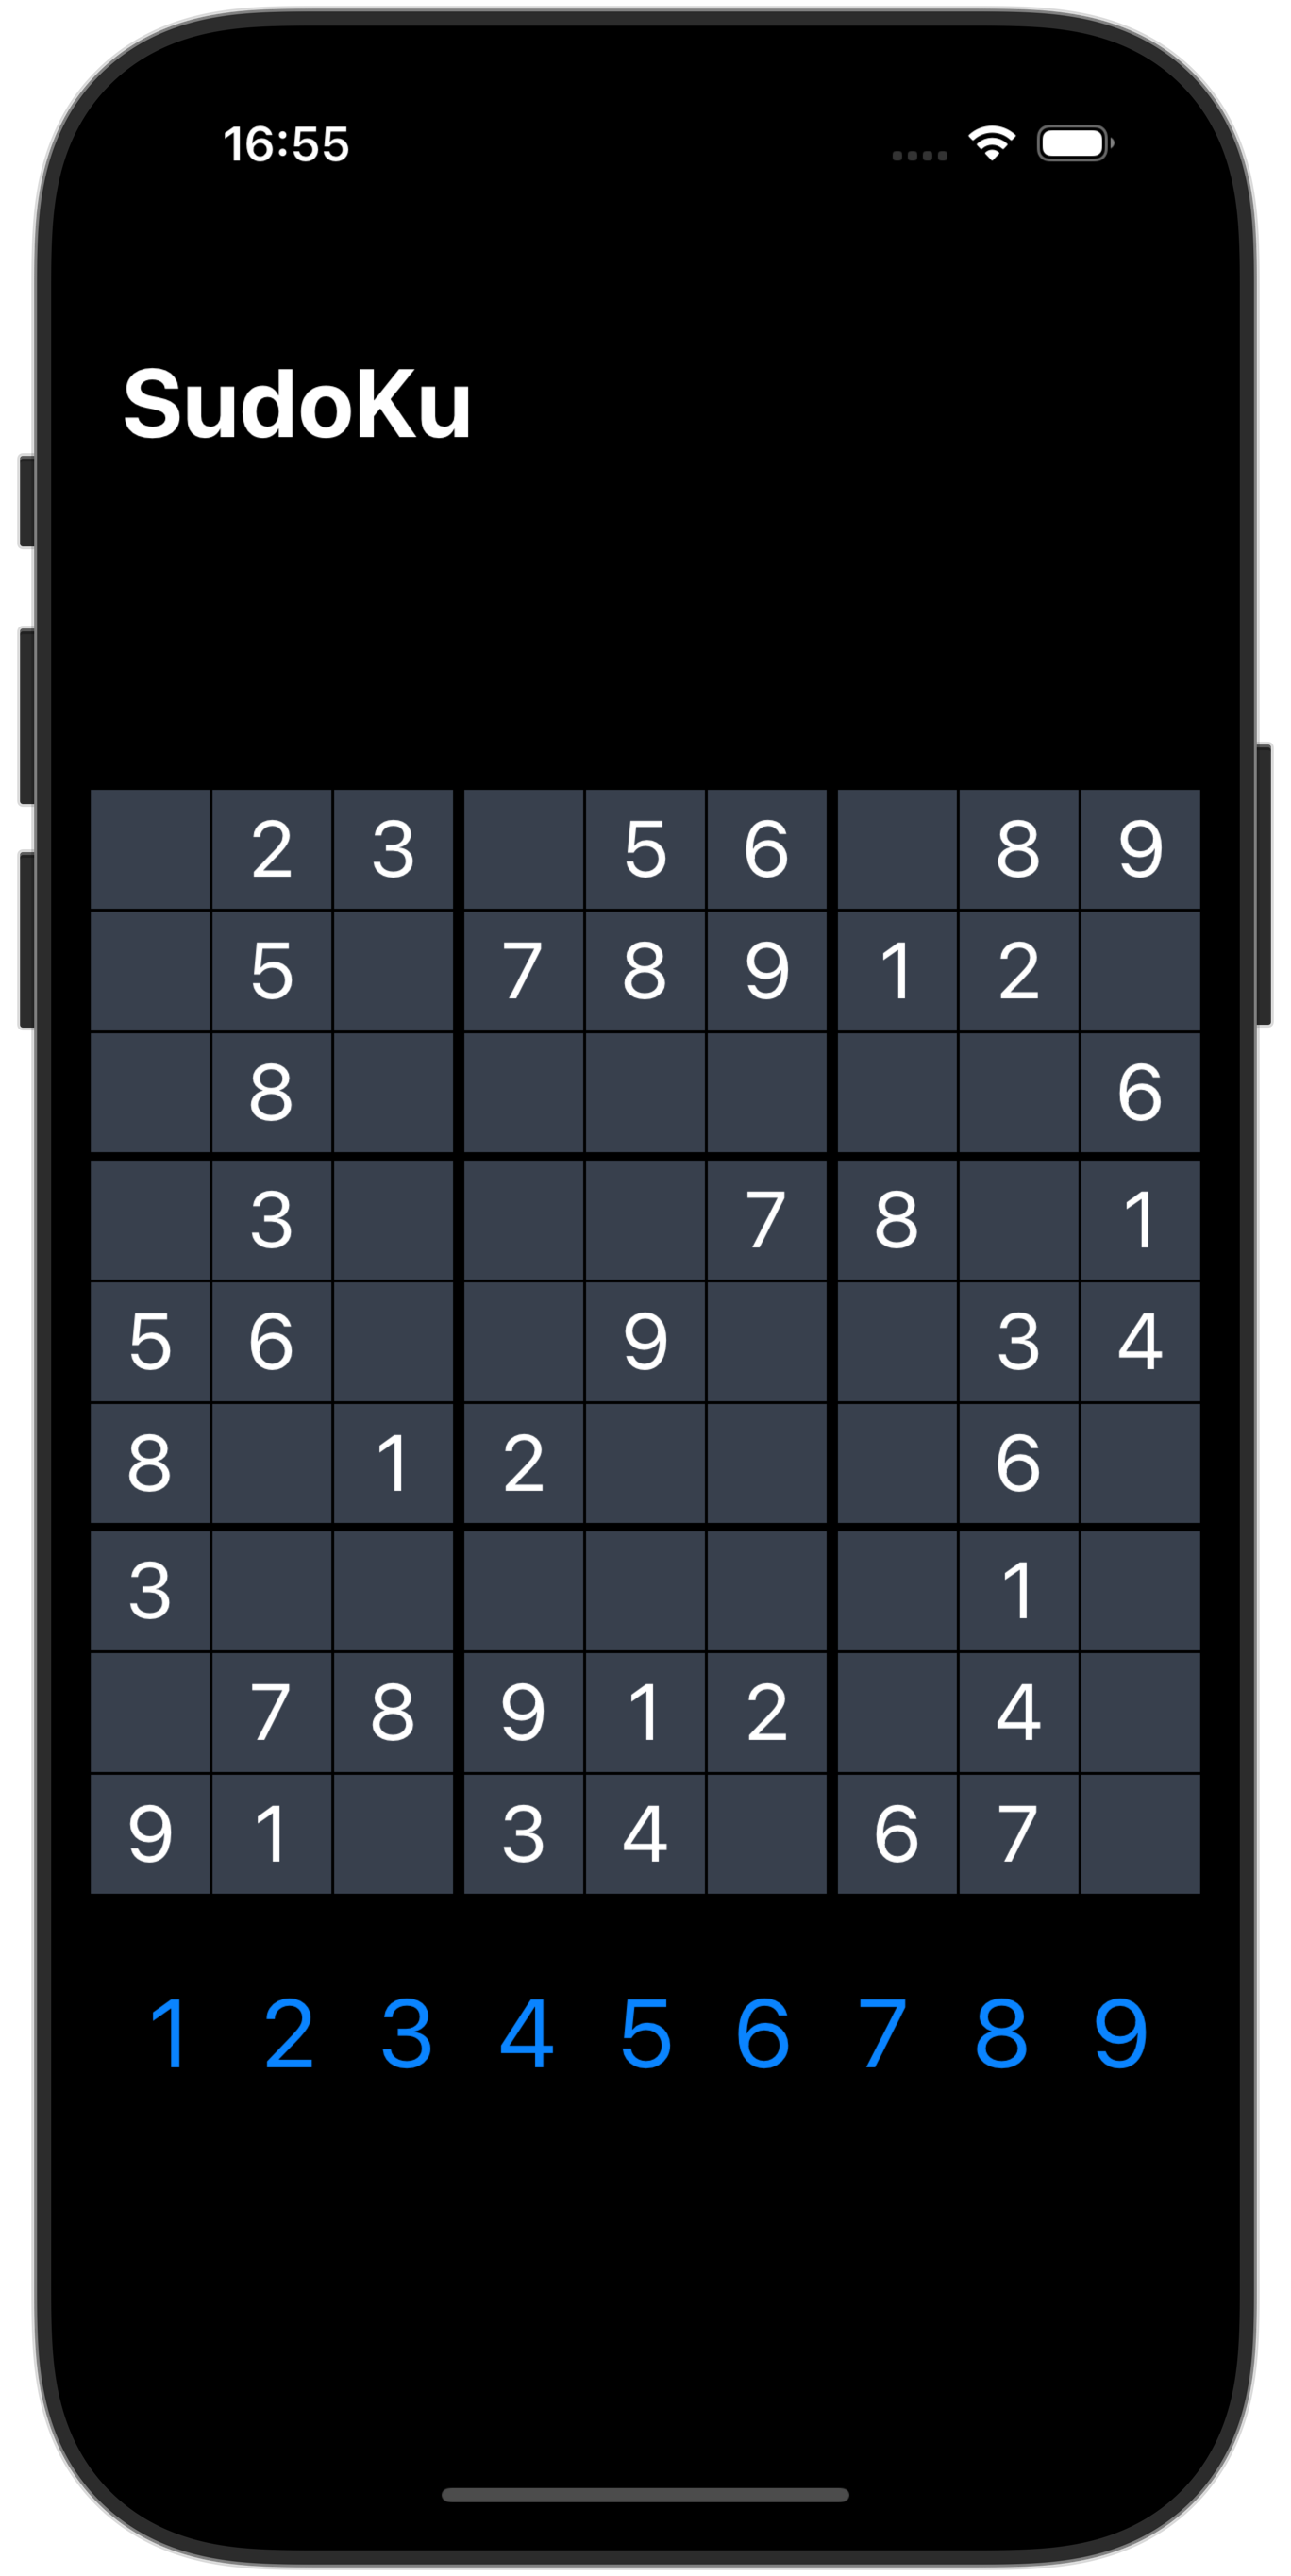
And now we’re really getting somewhere – the game is almost complete!
现在我们真的到达了某个地方 – 游戏即将完成!
Ending the game 结束游戏
In order for this to function well, we need a way to let the user start a new game on demand, or when they finish the board successfully. This can be tracked with two Boolean properties in ContentView:
为了使其正常运行,我们需要一种方法让用户按需开始新游戏,或者在他们成功完成棋盘时开始新游戏。这可以通过 ContentView 中的两个 Boolean 属性进行跟踪:
@State private var solved = false
@State private var showingNewGame = false
When it’s time to start a new game, either because they won or they gave up, we’ll just create a new board instance with whatever difficulty the player wanted then reset our live game data:
当需要开始新游戏时,无论是因为他们赢了还是放弃了,我们都会创建一个玩家想要的任何难度的新board实例,然后重置我们的实时游戏数据:
func newGame(difficulty: Board.Difficulty) {
    board = Board(difficulty: difficulty)
    selectedRow = -1
    selectedCol = -1
    selectedNum = 0
}
And now we can bring that together with the new properties inside an alert, by adding this to the NavigationStack:
现在,我们可以通过将以下内容添加到 NavigationStack 中,将其与 alert 中的新属性结合在一起:
.alert("Start a new game", isPresented: $showingNewGame) {
    ForEach(Board.Difficulty.allCases, id: \.self) { difficulty in
        Button(String(describing: difficulty).capitalized) {
            newGame(difficulty: difficulty)
        }
    }

    Button("Cancel", role: .cancel) { }
} message: {
    if solved {
        Text("You solved the board correctly - good job!")
    }
}
That handles what to do when game is finished, but when do we actually know it’s over? For that we need another method – one that will count all the values and check whether we have nine 1s, nine 2s, nine 3s, and so forth.
这处理了游戏结束时该做什么,但我们什么时候真正知道它已经结束了?为此,我们需要另一种方法 – 一种方法将计算所有值并检查我们是否有 9 个 1、9 个 2、9 个 3,依此类推。
That in itself isn’t so hard to do, but I want to make it do two jobs: as we’re busy counting the numbers, I also want to see if any value has appeared nine times in the correct place. If so, that means the number can’t appear elsewhere, so we can hide it in our UI.
这本身并不难做到,但我想让它做两项工作:当我们忙于计算数字时,我还想看看是否有任何值在正确的位置出现了九次。如果是这样,则意味着该数字不能显示在其他位置,因此我们可以在 UI 中隐藏它。
First we we need a new property to store all the numbers counts in our board:
首先,我们需要一个新的属性来存储看板中的所有数字计数:
@State private var counts = [Int: Int]()
That’s an [Int: Int] dictionary, with the keys being the numbers 1 through 9, and the values being how often those numbers appear.
这是一个 [Int: Int] 字典,键是数字 1 到 9,值是这些数字出现的频率。
Now we need a new updateCounts() method that calculates the latest number counts, stores it in counts, and also ends the game if needed.
现在我们需要一个新的 updateCounts() 方法,它计算最新的数字计数,将其存储在计数中,并在需要时结束游戏。
Let’s break it down into parts, starting with the method stub:
让我们将其分解为几个部分,从方法 stub 开始:
func updateCounts() {
    // more code to come
}
To start with, we can set solved to false because if we’re here it means we aren’t currently sure if the game is over:
首先,我们可以将 solve 设置为 false,因为如果我们在这里,则意味着我们当前不确定游戏是否结束:
solved = false
We can also create an empty dictionary of our counts.
我们还可以创建一个 count 的空字典。
var newCounts = [Int: Int]()
And to begin with, we have counted 0 correct squares, so we’ll set that too:
首先,我们计算了 0 个正确的方格,所以我们也要设置它:
var correctCount = 0
And now we can loop over all the rows and columns we have, adding to newCounts and correctCount every time we find a correct value:
现在我们可以遍历我们拥有的所有行和列,每次找到正确的值时都会添加到 newCounts 和 correctCount:
for row in 0..<board.size {
    for col in 0..<board.size {
        let value = board.playerBoard[row][col]

        if value == board.fullBoard[row][col] {
            newCounts[value, default: 0] += 1
            correctCount += 1
        }
    }
}
That’s the first part of the method complete, so we can copy newCounts into our counts property – we’ll be using that in our UI shortly:
这是方法 complete 的第一部分,因此我们可以将 newCounts 复制到我们的 counts 属性中 – 我们很快就会在 UI 中使用它:
counts = newCounts
The second part of this method has the job of deciding whether the game is over or not, and responding appropriately. This is as easy as checking whether correctCount matches all the squares in the board, and if so toggling our two Booleans after half a second:
此方法的第二部分的工作是决定游戏是否结束,并做出适当的响应。这就像检查 correctCount 是否匹配棋盘中的所有方格一样简单,如果匹配,请在半秒后切换我们的两个布尔值:
if correctCount == board.size * board.size {
    Task {
        try await Task.sleep(for: .seconds(0.5))
        showingNewGame = true
        solved = true
    }
}
That completes updateCount(), so now the game will end at the right time as long as we call it in the two places it’s needed: when the view is first shown, and every time the board property changes. Add these two modifiers to the NavigationStack to do just that:
这样就完成了 updateCount(),所以现在只要我们在需要的两个地方调用它,游戏就会在正确的时间结束:当视图第一次显示时,以及每次 board 属性发生变化时。将这两个修饰符添加到 NavigationStack 中以执行此作:
.onAppear(perform: updateCounts)
.onChange(of: board) { _ in
    updateCounts()
}
As we also just calculated all the counts for our numbers, we can also make the number buttons disappear when there are no more to place. Add this modifier to the number buttons:
由于我们还刚刚计算了数字的所有计数,因此当没有更多要放置时,我们也可以使数字按钮消失。将此修饰符添加到数字按钮:
.opacity(counts[i, default: 0] == 9 ? 0 : 1)
Much better! 好多了!
Finishing up with some polish 最后进行一些润色
We now have a working sudoku game, but before we’re done there are quite a few smaller refinements I want to make that will improve the whole experience.
我们现在有一个可以运行的数独游戏,但在我们完成之前,我想做很多较小的改进,以改善整个体验。
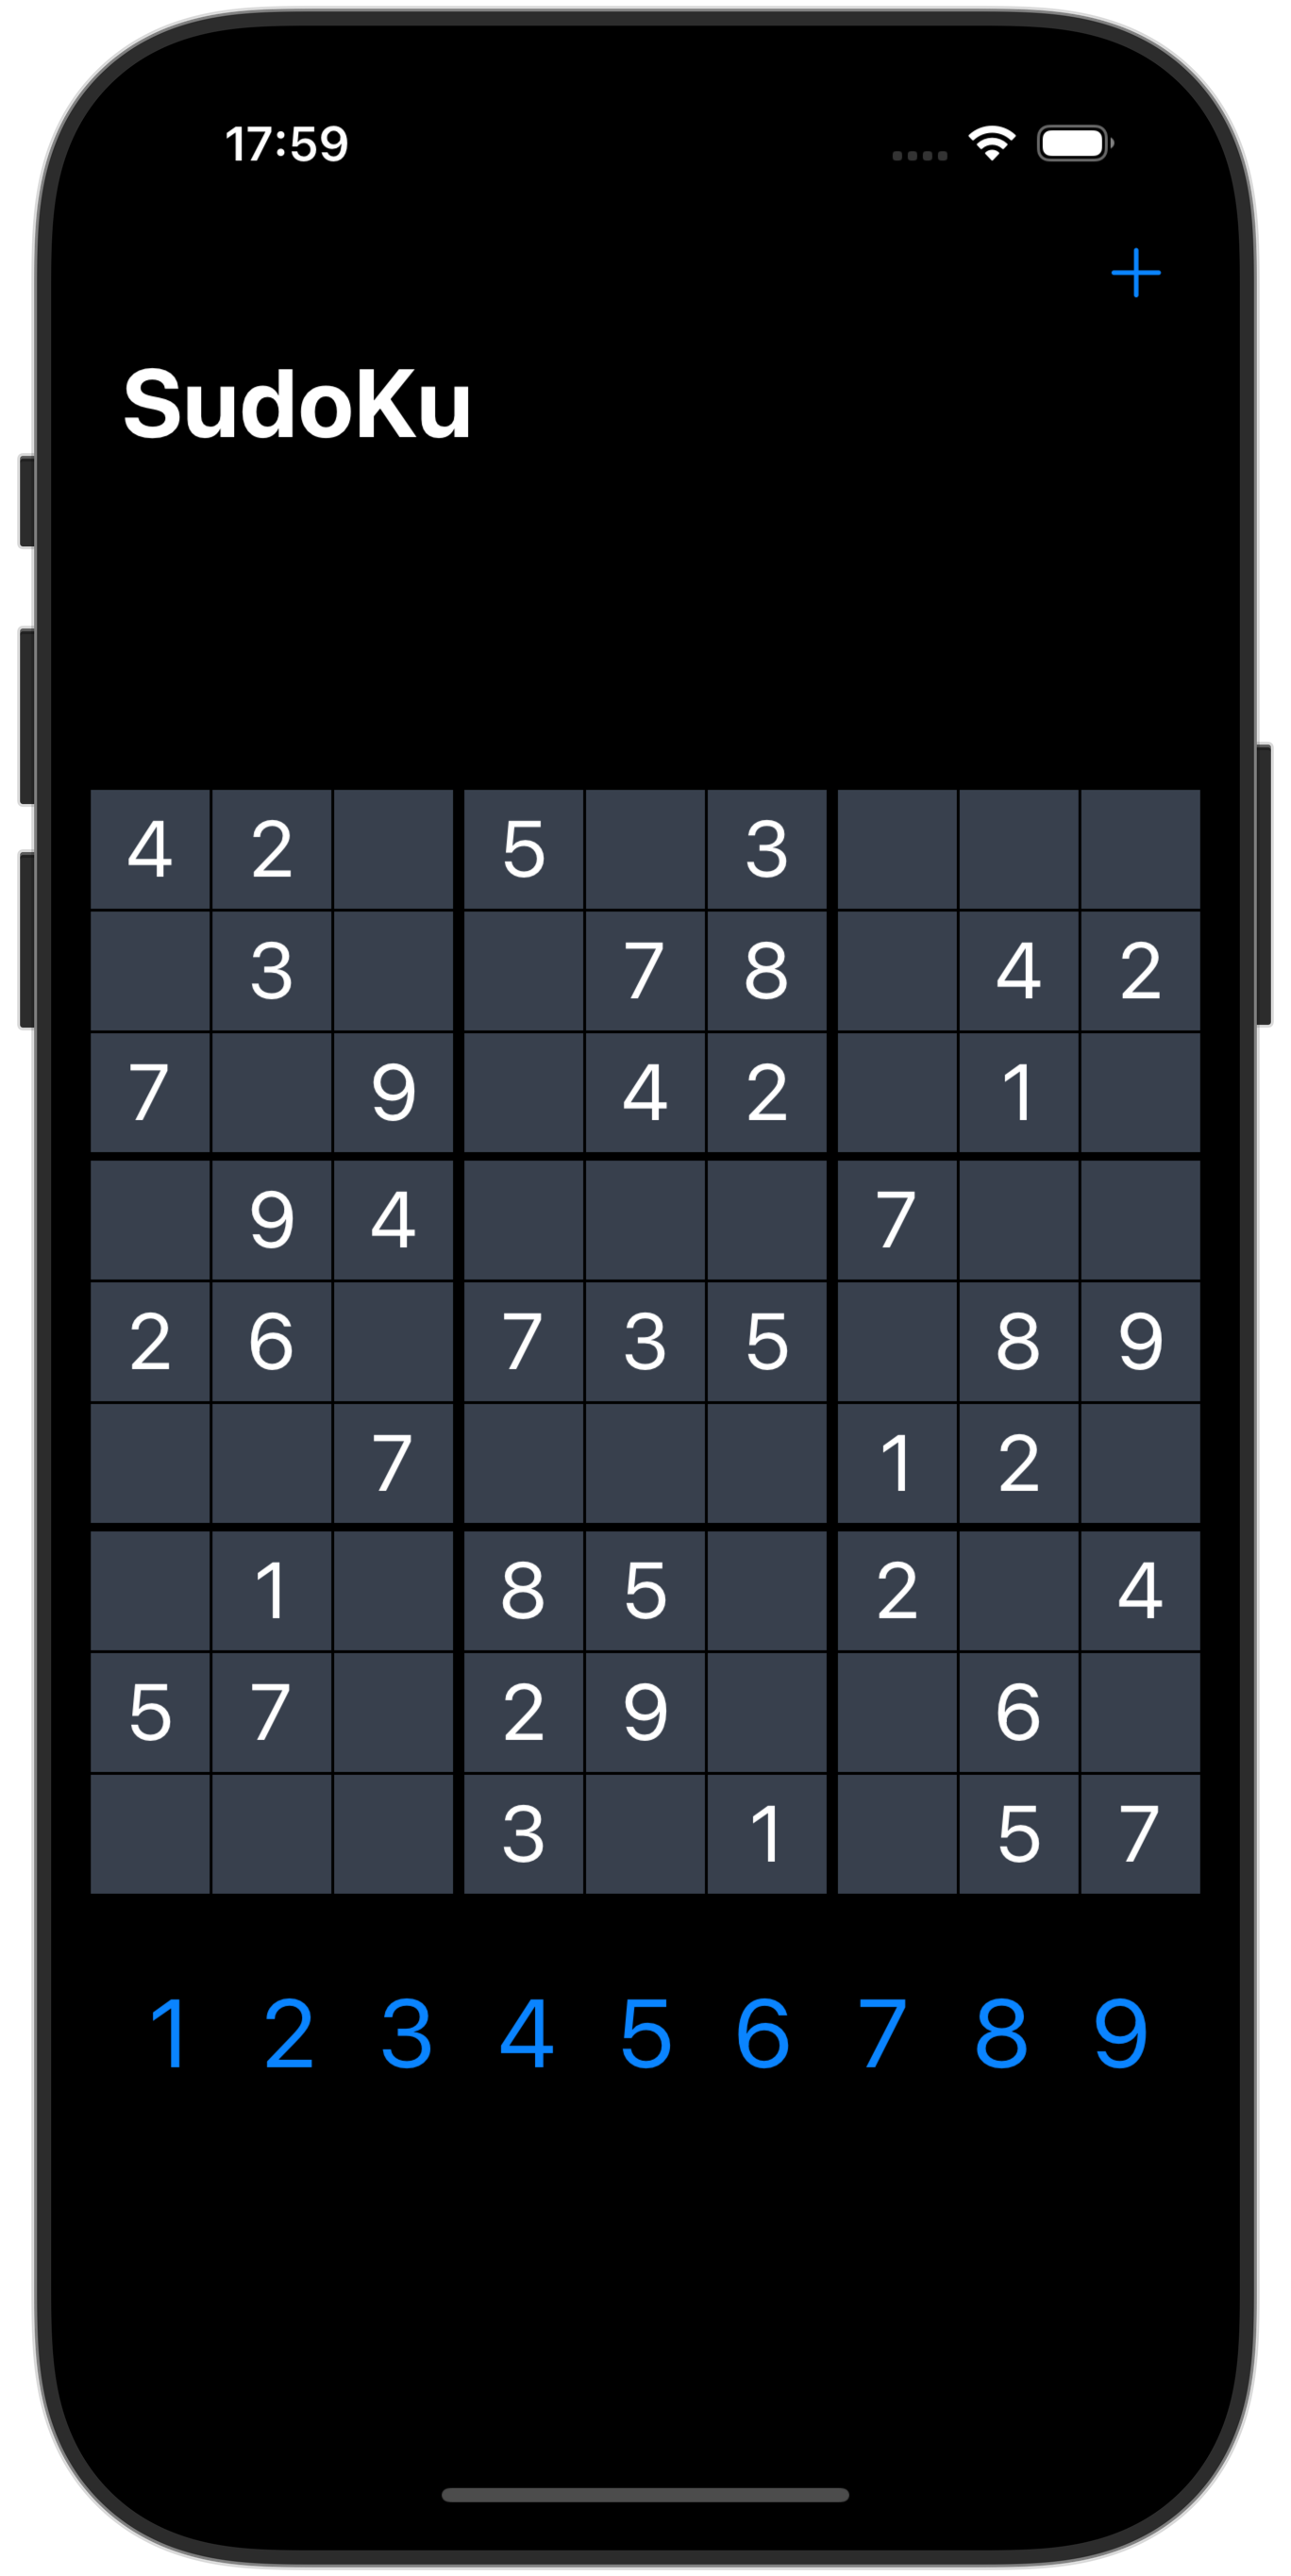
First, we’ve given the player the chance to start a new game when they finish a board, but we should also allow them to create a new board on demand. Add this to the VStack, below navigationTitle():
首先,我们让玩家有机会在完成一个棋盘时开始新游戏,但我们也应该允许他们按需创建新棋盘。将此代码添加到 VStack 的 navigationTitle() 下方:
.toolbar {
    Button {
        showingNewGame = true
    } label: {
        Label("Start a New Game", systemImage: "plus")
    }
}
Second, we forced the text size to a maximum of extra extra extra large, which isn’t great for folks who rely on big text to use their devices. To fix this we need to tell SwiftUI to activate the system’s large content viewer for CellView by attaching this below .buttonStyle(.plain):
其次,我们将文本大小强制为最大 extra extra extra large,这对于依赖大文本来使用设备的人来说不是很好。要解决此问题,我们需要告诉 SwiftUI 通过在下面附加以下内容来激活系统的 CellView 大型内容查看器 .buttonStyle(.plain):
.accessibilityShowsLargeContentViewer()
That will automatically detect the accessibility font size being enabled, and will let the user press and hold on a cell to see its number written large.
这将自动检测启用的辅助功能字体大小,并允许用户按住单元格以查看其数字写得更大。
Last but very far from least, let’s take a look at the algorithm we’re using to generate our numbers.
最后但并非最不重要的一点是,让我们看一下我们用来生成数字的算法。
First, an easy one: because of the way we clear the empty cells, our center cell always stays filled. If we divide the numbers as a Double and ceil() the result then we’ll be rounding up – we’ll remove everything up to cell 41 (the center) rather than cell 40.
首先,一个简单的方法:由于我们清除空单元格的方式,我们的中心单元格始终保持填充状态。如果我们将数字除以 Double 并 ceil() 结果,那么我们将四舍五入 – 我们将删除单元格 41(中心)之前的所有内容,而不是单元格 40。
let allCells = 0..<Int(ceil(Double(size * size) / 2))
As for the algorithm itself, we can get an immediate improvement by shuffling the numbers we place in our board’s create() method, so rather than placing them strictly 1 through 9 we instead place randomly:
至于算法本身,我们可以通过对板的 create() 方法中的数字进行洗牌来立即获得改进,因此我们不是严格地将它们放在 1 到 9 之间,而是随机放置:
let numbers = Array(1...size).shuffled()
That looks better initially, but on a filled grid you’ll still see lots of repetition: if you look at the number in the bottom-left corner of the grid then count right three and up one, you’ll see the same number again. If you count right another three and up one, you’ll see the same number again – it just keeps repeating, as do the other numbers.
这最初看起来更好,但在填充的网格上,您仍然会看到很多重复:如果您查看网格左下角的数字,然后数右 3 和向上 1,您将再次看到相同的数字。如果你再数对 3 和 1,你会再次看到相同的数字 – 它只是不断重复,其他数字也是如此。
We can do slightly better by shuffling the rows and columns. This needs to be done very carefully, because if we shuffle them fully then we’ll end up with duplicate numbers in a row or column.
我们可以通过对行和列进行洗牌来做得稍微好一些。这需要非常小心地完成,因为如果我们将它们完全洗牌,那么我们最终会在一行或一列中得到重复的数字。
What we can do for sure is shuffle the order in which rows and columns are placed: rather than placing them in order 0 through 8, we can shuffle them subgroups 0 through 2, 3 through 5, and 6 through 8. Each of those make up one 3×3 box in our grid, so we’re moving rows and columns around inside the 3×3 boxes rather than freely – we’re preserving the integrity of our grid, while still making the algorithm better.
我们可以肯定的是,按照行和列的顺序进行随机排序:我们可以将它们的子组 0 到 2、3 到 5 和 6 到 8 的顺序随机排列,而不是将它们按顺序 0 到 8 排列。它们中的每一个都构成了我们网格中的一个 3×3 盒子,因此我们在 3×3 盒子内移动行和列,而不是自由移动——我们保持了网格的完整性,同时仍然使算法变得更好。
To do this, replace the existing let rows and let columns lines in the create() method with this:
为此,请将 create() 方法中现有的 let rows 和 let columns 行替换为以下内容:
let rows = Array([[0, 1, 2].shuffled(), [3, 4, 5].shuffled(), [6, 7, 8].shuffled()].shuffled()).joined()
let columns = Array([[0, 1, 2].shuffled(), [3, 4, 5].shuffled(), [6, 7, 8].shuffled()].shuffled()).joined()
That will ensure rows contains 0, 1, and 2 in a random order, but also before 3, 4, 5 in a random order, and before 6, 7, and 8 in a random order.
这将确保行包含随机顺序的 0、1 和 2,但也允许以随机顺序在 3、4、5 之前以及以随机顺序在 6、7 和 8 之前。
This algorithm is still far from perfect, but it’s about as complex as I can reasonably explain in a project. However, I really think it would be a good idea to open source something like this – a pure sudoku engine, without the SwiftUI parts – so that folks can make their own games based on it, and perhaps contribute to improving the algorithm.
这个算法还远非完美,但它的复杂程度与我可以在项目中合理解释的一样复杂。但是,我真的认为开源这样的东西是个好主意——一个纯粹的数独引擎,没有 SwiftUI 部分——这样人们就可以基于它制作自己的游戏,也许可以为改进算法做出贡献。
Anyway, that’s our game done – give it a try! Given that it’s only taken an hour or two to create I think it’s pretty effective.
无论如何,我们的游戏已经完成了 – 试一试吧!鉴于创建只需要一两个小时,我认为它非常有效。


暂无评论内容