
温馨提示:本文最后更新于
2025-02-05 11:14:32,某些文章具有时效性,若有错误或已失效,请在下方留言。当前状态处理更新的上下文。
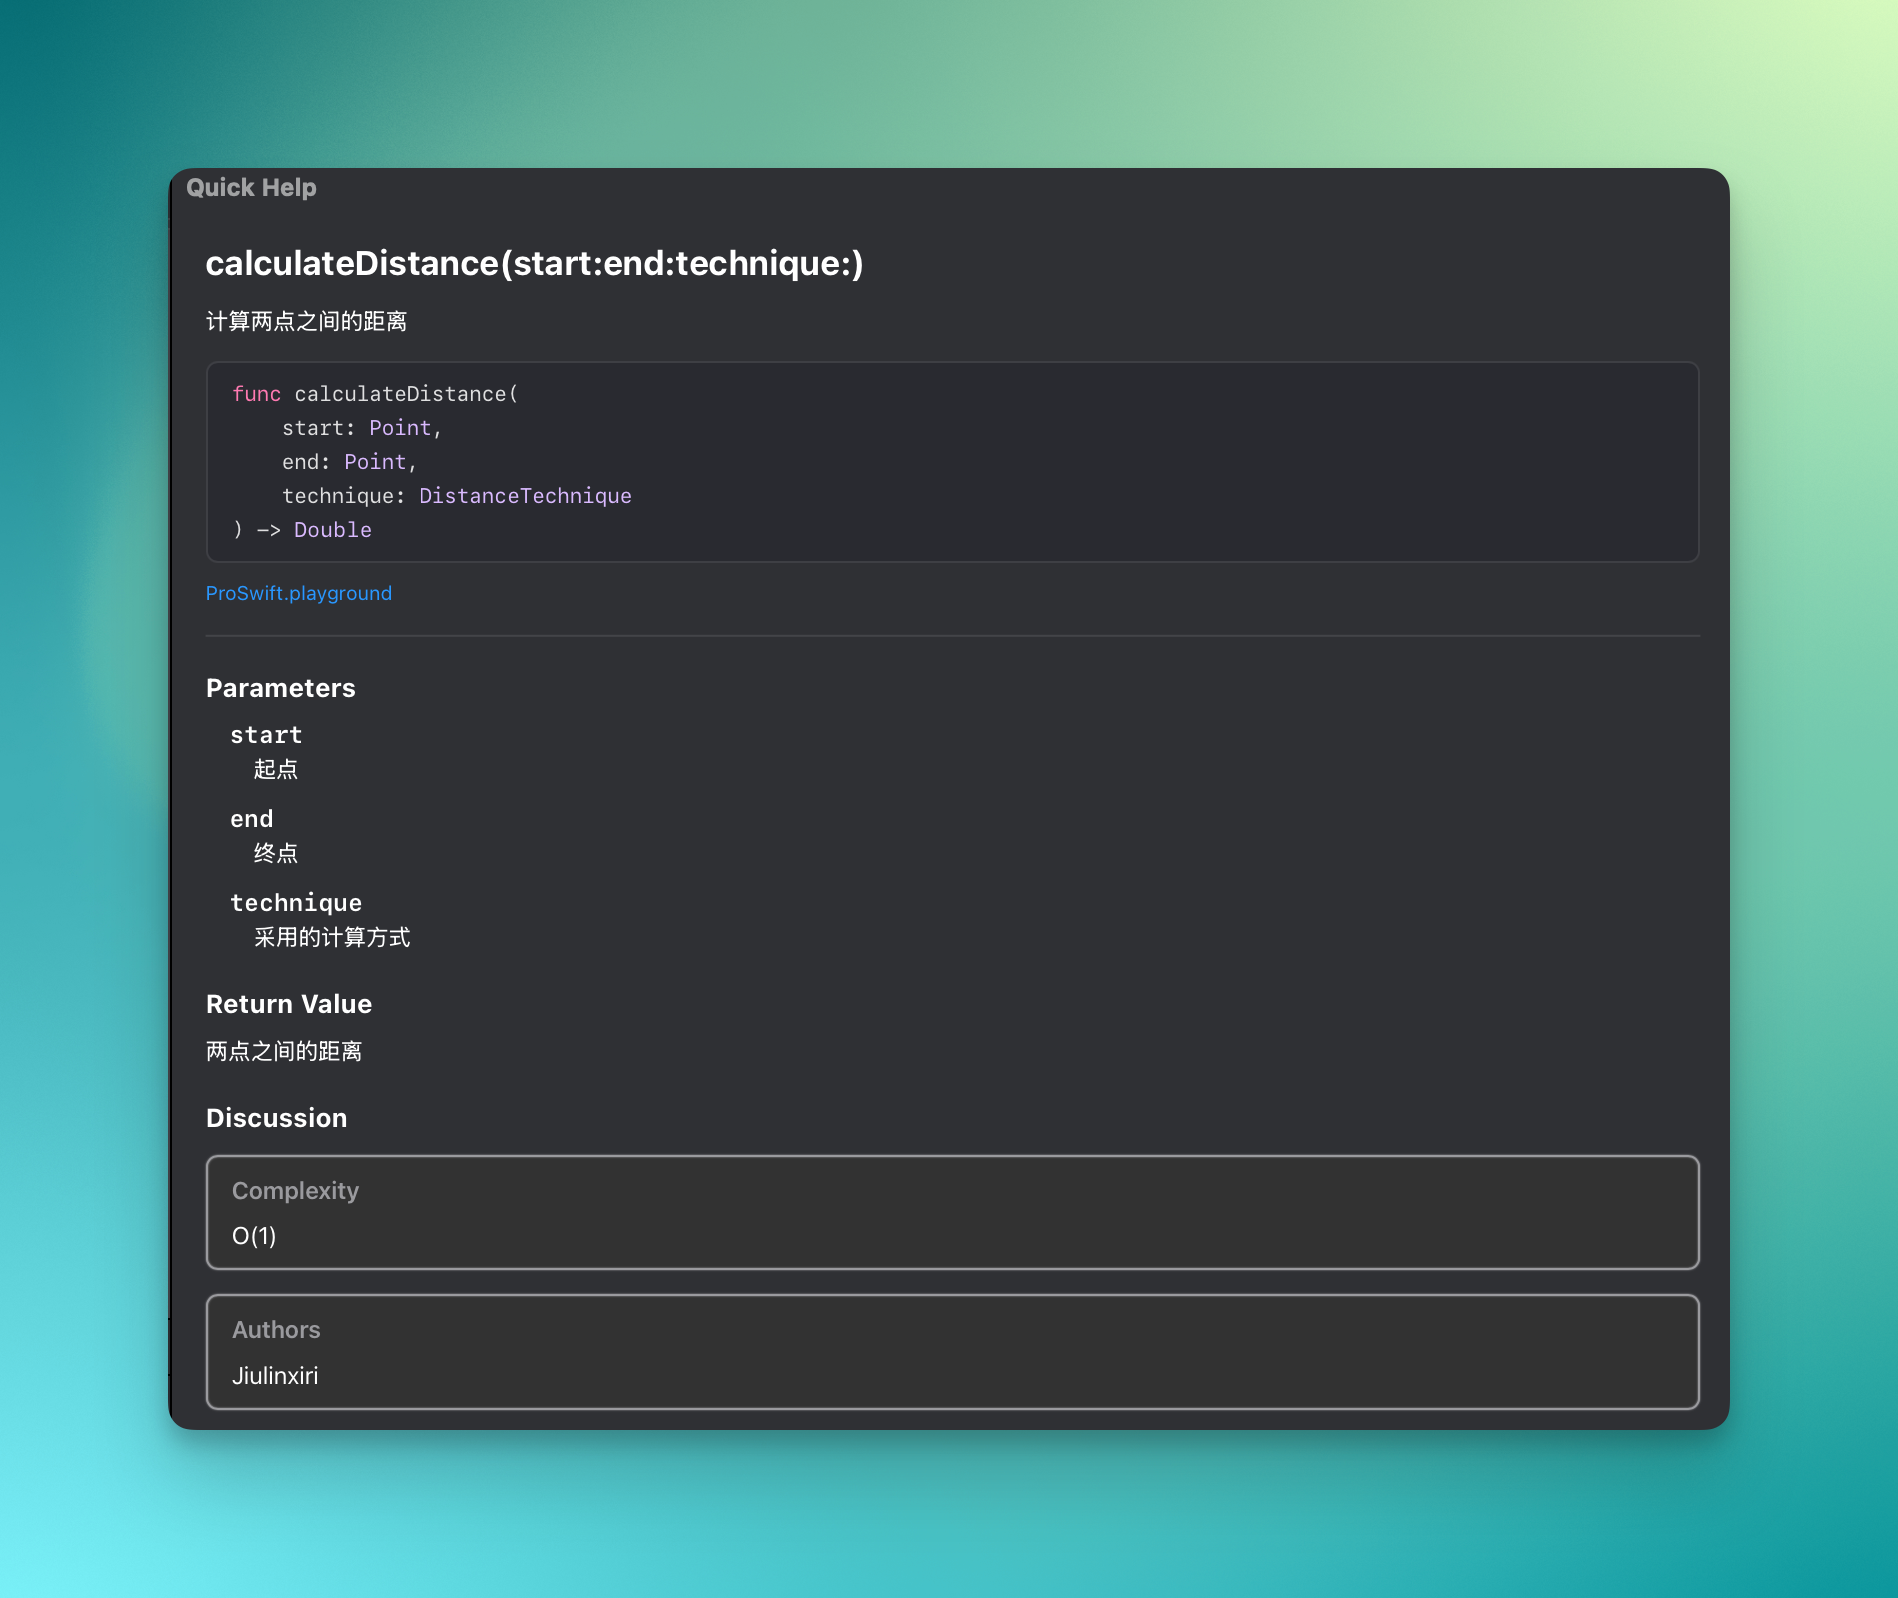
transaction(value:_:)
使用.transaction 修饰符来更改或替换视图中使用的动画。考虑一个由按钮控制的三个相同视图,同时改变所有三个的情况:
- 第一个视图通过旋转“Rotation”文本视图360度来进行动画处理。
- 第二个视图使用
transaction(_:)修饰符来改变动画,通过在动画开始时添加两秒的延迟,然后将“Rotation\nModified”文本视图动画的旋转速度增加两倍。 - 第三个视图使用
transaction(_:)修饰符来禁用影响“Animation\nReplaced”文本视图的动画。
以下代码实现了这些动画:
struct TransactionExample: View {
    @State var flag = false

    var body: some View {
        VStack(spacing: 50) {
            HStack(spacing: 30) {
                Text("Rotation")
                    .rotationEffect(Angle(degrees: flag ? 360 : 0))
                Text("Rotation\nModified")
                    .rotationEffect(Angle(degrees: flag ? 360 : 0))
                    .transaction(value: flag) { t in
                        t.animation = t.animation?.delay(2.0).speed(2)
                    }

                Text("Animation\nReplaced")
                    .rotationEffect(Angle(degrees: flag ? 360 : 0))
                    .transaction(value: flag) { t in
                        t.disablesAnimations = true
                    }
            }

            Button("Animate") {
                withAnimation(.easeIn(duration: 2.0)) {
                    flag.toggle()
                }
            }
        }
    }
}
考虑由一个按钮控制的三个相同的动画,同时执行所有三个动画:
- 第一个动画将”Rotation”文本视图旋转360度。
- 第二个动画使用
transaction(_:)修饰符来改变动画,通过在动画开始时添加两秒的延迟,然后将”Rotation\nModified”文本视图动画的旋转速度增加两倍。 - 第三个动画使用
transaction(_:)修饰符来替换影响”Animation\nReplaced”文本视图的旋转动画为弹簧动画。
以下代码实现了这些动画:
struct TransactionExample: View {
    @State private var flag = false
    var body: some View {
        VStack(spacing: 50) {
            HStack(spacing: 30) {
                Text("Rotation")
                    .rotationEffect(Angle(degrees: self.flag ? 360 : 0))
                Text("Rotation\nModified")
                    .rotationEffect(Angle(degrees: self.flag ? 360 : 0))
                    .transaction { view in
                        view.animation =
                            view.animation?.delay(2.0).speed(2)
                    }

                Text("Animation\nReplaced")
                    .rotationEffect(Angle(degrees: self.flag ? 360 : 0))
                    .transaction { view in
                        view.animation = .interactiveSpring(
                            response: 0.60,
                            dampingFraction: 0.20,
                            blendDuration: 0.25
                        )
                    }
            }
            Button("Animate") {
                withAnimation(.easeIn(duration: 2.0)) {
                    self.flag.toggle()
                }
            }
        }
    }
}
withTransaction
您可以使用此属性来关闭可能正在显示模态展示的窗口,方法是使用 .destructive 值:
struct DismissWindowButton: View {
    @Environment(\.dismissWindow) private var dismissWindow

    var body: some View {
        Button("Close Auxiliary Window") {
            withTransaction(\.dismissBehavior, .destructive) {
                dismissWindow(id: "auxiliary")
            }
        }
    }
}
使用 witnTransaction 修饰符实现一个滚动到底部的动画。
struct NamedFont: Identifiable {
    let name: String
    var id = UUID()
}
struct ScrollTargetAnchorView: View {
    private let namedFonts: [NamedFont] = [
        NamedFont(name: "Large Title"),
        NamedFont(name: "Title"),
        NamedFont(name: "Headline"),
        NamedFont(name: "Body"),
        NamedFont(name: "Caption")
        // ...
    ]
    @State private var position: NamedFont.ID?
    var body: some View {
        ScrollView {
            LazyVStack {
                ForEach(namedFonts) { item in
                    Text(item.name)
                }
            }
            .scrollTargetLayout()
        }
        .scrollPosition(id: $position)
        .safeAreaInset(edge: .bottom) {
            Button("Scroll To Bottom") {
                withAnimation {
                    withTransaction(\.scrollTargetAnchor, .bottom) {
                        position = namedFonts.last?.id
                    }
                }
            }
        }
    }
}
过渡添加和删除视图
默认情况下,SwiftUI 使用淡入淡出动画来插入或删除视图,但是如果需要,可以通过将 transition()修饰符附加到视图来更改它。
例如,我们可以使几种文本视图以不同的方式过渡,如下所示:
struct ContentView: View {
    @State private var showDetails = false

    var body: some View {
        VStack {
            Button("Press to show details") {
                withAnimation {
                    showDetails.toggle()
                }
            }

            if showDetails {
                // 从底部移入
                Text("Details go here.")
                    .transition(.move(edge: .bottom))

                // 从前导位置移入,移出到尾部边缘
                Text("Details go here.")
                    .transition(.slide)

                // 从小开始,逐渐增长到全尺寸
                Text("Details go here.")
                    .transition(.scale)
            }
        }
    }
}
创建不对称过渡
我们可以创建一个使用非对称过渡的文本视图,这样它在添加时从前边缘移入,而在删除时则向下移至底部边缘,如下所示:
struct ContentView: View {
    @State private var showDetails = false

    var body: some View {
        VStack {
            Button("Press to show details") {
                withAnimation {
                    showDetails.toggle()
                }
            }

            if showDetails {
                Text("Details go here.")
                    .transition(.asymmetric(insertion: .move(edge: .leading), removal: .move(edge: .bottom)))
            }
        }

    }
}
创建自定义过渡
尽管SwiftUI内置了多种选择,但如果我们愿意,也可以编写完全自定义的过渡。该过程分三个步骤:
- 创建一个
ViewModifier来表示您处于任何状态的过渡。 - 创建一个
AnyTransition扩展,将您的视图修饰符用于活动状态和身份状态。 - 使用
transition()修饰符将该过波应用于视图。
例如,我们可以编写形状和视图修改器组合,以模仿 Keynote 中的 Iris 动画-它使新的幻灯片出现在向上增长的圆圈中,有点像旧日的 Looney Tunes 简介序列。
为了演示这一点,我将向您展示一个完整的代码示例,该示例执行以下操作:
- 定义
ScaledCircle形状,该形状在根据某些可动画化数据进行缩放的矩形内部创建一个圆。 - 创建一个自定义
ViewModifier结构,以将任何形状(在我们的示例中为缩放圆)应用为另一个视图的剪辑形状。 - 将其包装在
AnyTransition扩展中,以将该修饰符包装在过渡中,以便于访问。 - 创建一个 swiftUI 视图以演示我们的过波过程。
这是代码,并附有注释以说明发生了什么:
struct ScaledCircle: Shape {
    // 这可控制绘图矩形内部的圆的大小。
    // 值为0时,圆圈是不可见的;
    // 值为1时,圆圈将填充矩形。
    var animatableData: CGFloat

    func path(in rect: CGRect) -> Path {
        let maximumCircleRadius = sqrt(rect.width * rect.width + rect.height * rect.height)
        let circleRadius = maximumCircleRadius * animatableData

        let x = rect.midX - circleRadius / 2
        let y = rect.midY - circleRadius / 2

        let circleRect = CGRect(x: x, y: y, width: circleRadius, height: circleRadius)

        return Circle().path(in: circleRect)
    }
}

// 可以使用任何形状剪切任何视图的常规修改器。
struct ClipShapeModifier<T: Shape>: ViewModifier {
    let shape: T

    func body(content: Content) -> some View {
        content.clipShape(shape)
    }
}

// 结合了 ScaledCircle 和 ClipShapeModifier 的自定义过渡。
extension AnyTransition {
    static var iris: AnyTransition {
        .modifier(
            active: ClipShapeModifier(shape: ScaledCircle(animatableData: 0)),
            identity: ClipShapeModifier(shape: ScaledCircle(animatableData: 1))
        )
    }
}

// 使用我们的转场显示和隐藏红色矩形的示例视图移动。
struct ContentView: View {
    @State private var isShowingRed = false

    var body: some View {
        ZStack {
            Color.blue
                .frame(width: 200, height: 200)

            if isShowingRed {
                Color.red
                    .frame(width: 200, height: 200)
                    .transition(.iris)
                    .zIndex(1)
            }
        }
        .padding(50)
        .onTapGesture {
            withAnimation(.easeInOut) {
                isShowingRed.toggle()
            }
        }
    }
}
THE END


暂无评论内容